vGateway Nested Share Configuration (NFS)
- 05 May 2021
- DarkLight
vGateway Nested Share Configuration (NFS)
- Updated on 05 May 2021
- DarkLight
Article summary
Did you find this summary helpful?
Thank you for your feedback
While the creation of additional Folders and Nested Shares will be the most common File System configuration action take, Global File System Architecture KB. Creating unnecessary Folders and Nested shares will increase the complexity of the deployment and require additional administration.
Before configuring an NFS share, ensure that a Cloud Folder has been configured for NFS and the vGateway has NFS enabled per best practices.
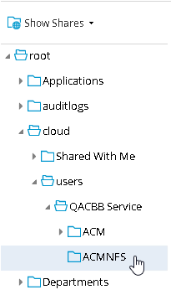
Create the Folder Structure
- Login to the vGateway
- Select the Files tab

- In the folder navigation, select the Cloud Folder created for NFS
- Select Actions and then New Folder
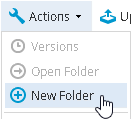
- Enter a Name and select OK

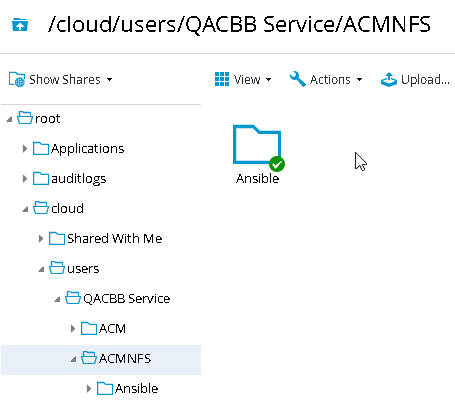
- Reload the tree and verify your new folder is displayed


Create the Nested Share(s)
Now that the folder structure has been created by an Administrator, nested shares will be utilized to make the locations available outside of the Administrator Share.
- Login to the vGateway
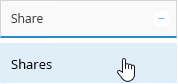
- Select Share and then Shares
- Select New Share
- Select a Folder to Share
- Expand the Cloud tree and locate the folder you wish to create a share for, selecting it
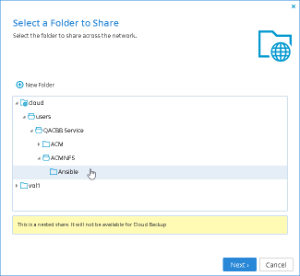
- Select Next
- Expand the Cloud tree and locate the folder you wish to create a share for, selecting it
- Specify a Share Name
- Network Share Name: Desired Name (Removing Cloud is suggested)
- Comment: Optional Comment
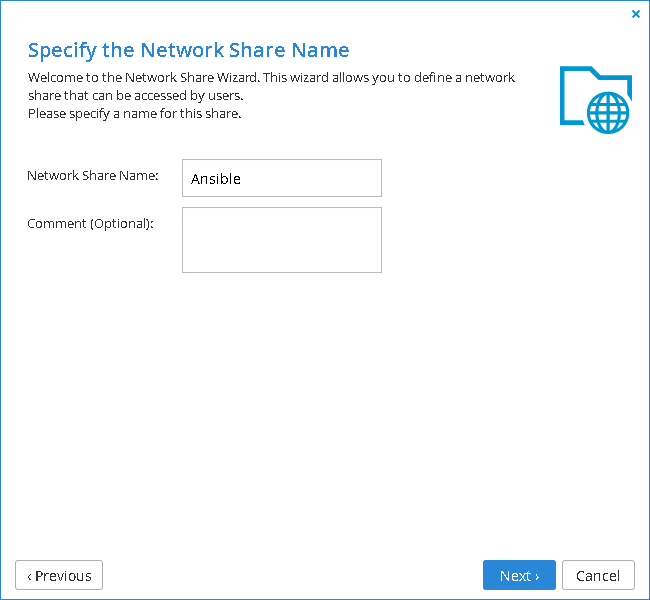
- Select Next
- Configure Sharing Protocols
- Windows File Sharing: Only Authenticated Users
- Client Side Caching: Disabled
- FTP: Disabled
- Search: Disabled

- Select Next
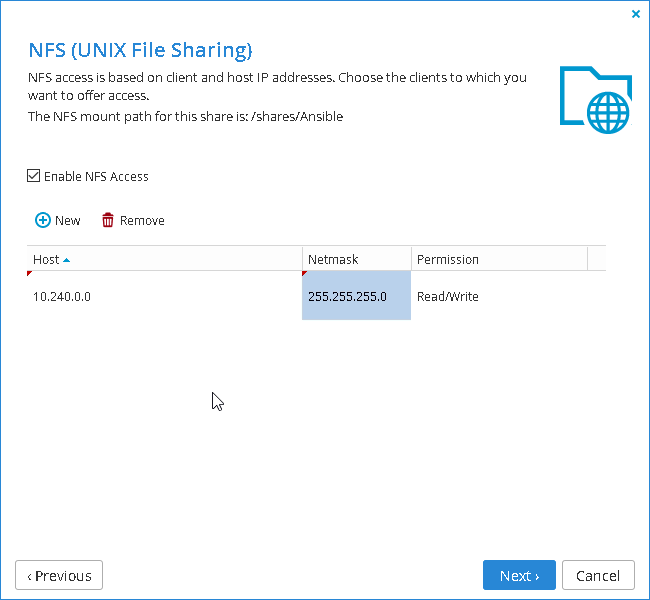
- Configure NFS Access
- Enable NFS Access: Checked
- Select Newto configure a host for the NFS Access Lists
- Add additional entries as required
- Add additional entries as required
- Select a Folder to Share


- Select Next
- Configure Permissions
- Remove the Everyone group with the trash can icon
- Add the local admin user
- This will ensure there is no inadvertent access on SMB to the NFS share

- This will ensure there is no inadvertent access on SMB to the NFS share
- Select Next
- Select Finish
- Confirm the share is listed

- Confirm the newly created share by mounting it
- Note that the share will be available at vGatewayIP:/shares/ShareName


Was this article helpful?