This document is provided to Virtual Colocation clients to give instructions for:
- Remotely connecting to the Virtual Colocation environment
- Connecting to the management platform; vSphere Web Client
- Management:
- Uploading ISOs
- Virtual machine setup and creation
- Powering on a virtual machine
- Installing VMware tools
OVERVIEW
To remotely access the Virtual Colocation underlying virtualization platform (VMware), you must first use the Expedient Secure User VPN to securely communicate with the management tools for the Virtual Colocation environment. Once a connection is established, you will use the vSphere Web Client to connect to the hypervisor for management access. The vSphere Web Client will require your credentials provided to you by Expedient.
When accessing the Expedient Secure User VPN site for the first time, you will have to install a Network Connect or Pulse Secure Client for the connection to work correctly. Once this client is installed, you should not have to install it again when logging in for future uses unless it is uninstalled. This process is outlined in the steps found in this document.
SECURE USER VPN CONNECTION
1. Open a web browser and navigate to the Expedient Virtual Colocation SECURE USER VPN logon site that matches your Expedient market. This URL will be specified in the Workbook - this is one of the tabs you will see when viewing your project ticket in the Expedient Support Management Console (SMC). If you cannot locate this information, please get in touch with your Project Manager.
2. Logon using the username and password provided to you by Expedient. This will also be provided to you via the Workbook (see figure 1)
Figure 1 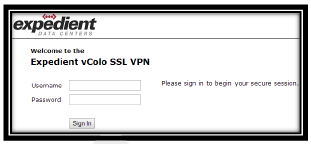
INSTALLING THE PULSE SECURE SETUP CLIENT
1. Depending on your internet browser settings (upon successful authentication), there may be several prompts and security warnings. Review what they say and then select OK to proceed.
2. (FIRST TIME ONLY) Next, you must download and install the Pulse Secure Setup Client Installer if this is your first time connecting to the SECURE USER VPN website. Once this client is installed (unless uninstalled), you should not have to perform this step again in the future. Note: Depending on your internet browser and your internet browser configuration, the Network Connect Setup Client may install automatically. If not, you may have to choose to run the program either from the internet browser or save it locally.
3. If the client installer is saved locally, navigate to the saved location and then double-click on the program icon to install the client.
4. Next, a quick setup of the Network Connect Client occurs, and once the setup is complete select Close.
5. Once Network Connect is installed, navigate back to the Virtual Colocation SECURE USER VPN site and click on the link it requests to proceed.
6. Depending on your internet browser and internet browser settings, during your logon a warning may appear. If so, review what it says and click the appropriate box to proceed.
a. A window should appear showing the client install progress.
7. After the download is complete and the install finishes, the SECURE USER VPN will then connect to the Expedient Virtual Colocation SECURE USER VPN network. Successful logons will be indicated by a "gold colored lock" within the Windows System Tray, similar to the below image.

8. If the lock does not appear or is not "gold," then select the Network Connect Start button within your internet browser. (see figure 3)
9. This will complete the setup of the Expedient Virtual Colocation Secure User VPN connection.
LOGON: VSPHERE WEB CLIENT
This section will explain how to connect to the vSphere Web Client.
- Once connected to the Secure User VPN (detailed above), open a web browser and navigate to the Expedient vSphere URL specific to your location. This URL will be specified in the Project Workbook. If you cannot locate this information, please get in touch with your Project Manager.
- Click a link to open the vSphere client. We recommend choosing the HTML5 client if you don't already have a Flash plug-in installed.
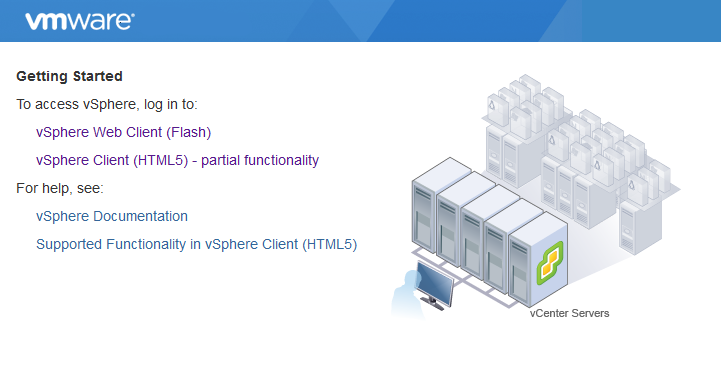
- When presented with the login prompt, enter your Expedient-provided credentials. Be sure to add the domain of CUSTCBB\ before your username.