Your File Server VMs will be created by Expedient, but you will need to create SMB shares to begin using Nutanix Files.
Creating a new share is done in the ‘Files Console' within Prism Element GUI.
In the dropdown menu, click Files
Select the file server > then click Launch Files Console

1) In the Files Console, click the Shares & Exports tab
Click the +New Share or Export button to create a new share
.png)
Fill in the name of the new share.
Name
The name of the share will also be the path
Example: A File Server named ‘filesvr1’ and a share named ‘share1’ would have the path \\filesv1\share1
Note the following naming conventions & limitations for Nutanix Files Shares (click arrow on the right to expand):
Files does not allow the following names:
Global
Printers
admin$ (reserved)
ipc$ (reserved)
homes (reserved)
Share names are not case-sensitive.
Each share name must be unique.
A share name must not start or end with a blank space.
A share name must not start with a dot (.)
A share name must follow a regular expression: ^[^!@#%~'\"^&$()\\[\\]|+=*{}\\/\\\\<>:;,’`]*[$]?$
Names that end with the $ are hidden shares.
See Configuration Maximums for name length limits.
Description and Share Path are optional
You can create nested shares by specifying the path. Nested shares inherit some properties from the parent directory.
See Nested Shares and Exports for details.
Max Size - A share size should be specified, if not it be the size of the file server.
Primary Protocol Access - Your options are SMB, NFS or multi-protocol. Select SMB.
Click Next
.png)
2) In the Settings tab you will choose what type of share you wish to create any other settings
A Distributed share, also known as a home share, load-balances user data across multiple FSVMs by distributing top-level directories.
A Standard share, also known as a general-purpose share, serves data and connections from a single FSVM.
The default setting of a new share is “Standard”
A distributed share is frequently used as the repository for the personal files of a user, while a standard share is frequently the repository shared by a group.
Tip: When using a distributed share for user profiles, facilitate better load distribution by creating a top-level directory (TLD) for each user.
Leave Enable Compression checked
Self Service restore can be turned on later if required
Click Next
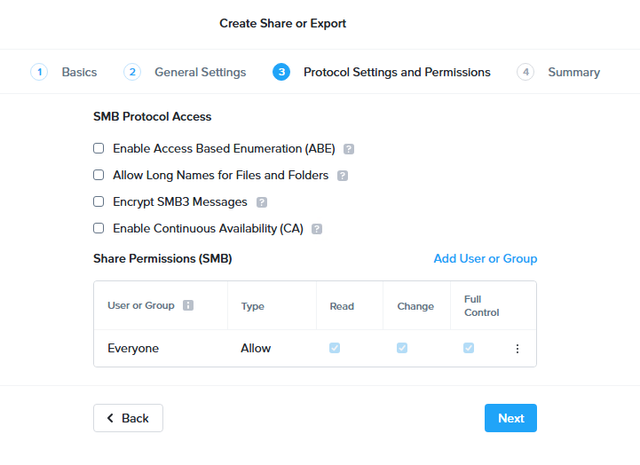
3) In the Protocol Settings and Performance, select any additional SMB settings or alter permissions on the share
View the Nutanix documentation for further details on each setting -
Nutanix Support & Insights
Click Next
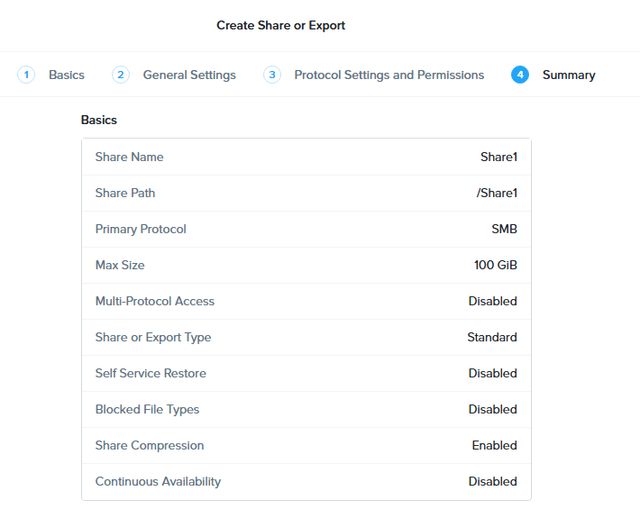
4) Review the Summary page and if all settings are correct, click Create.
You will now be able to use your Nutanix Files SMB share.