Introduction
Expedient Service Delivery staff will perform a base configuration of a Protection Job inside the Cloud Data Protection platform. To create your own Protection Job for NAS Mount Points, follow the below procedure.
Procedure
- Log in to the Cloud Data Protection system.
- Upon logging into the cluster, you should be directed to the Protection Jobs page.
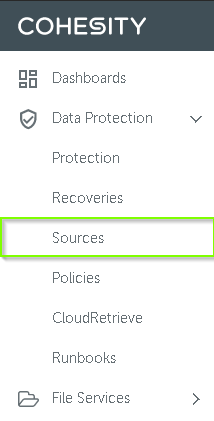
- To register a SQL server, from the navigation bar at the top of the page, select the Protection → Sources tab.
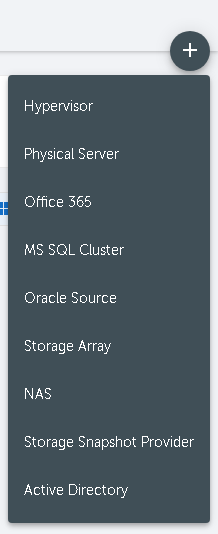
- Click
 , then select NAS.
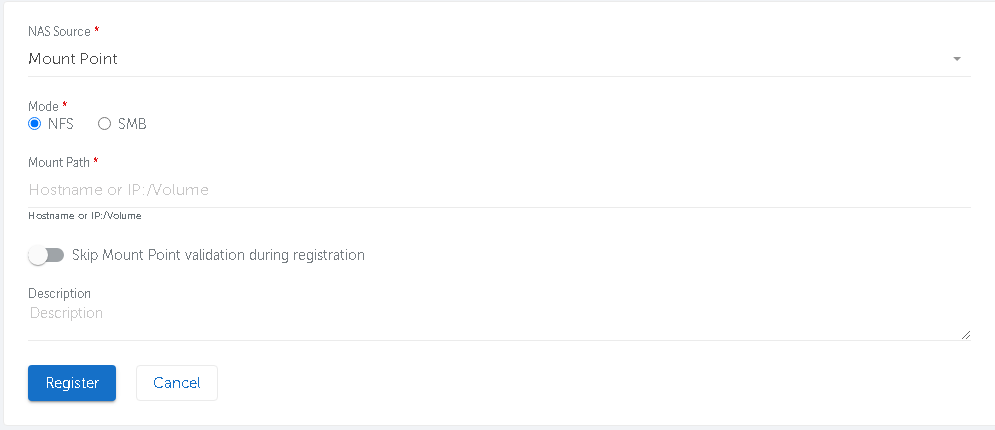
- Select Mount Point for the 'NAS Source,' NFS for the 'Mode,' and input the full Mount Path(ex. IP:/Volume). Click Register to finish.
- With a successful NAS Mount Point registration and on the Sources page again, search for and find the newly created NAS object.
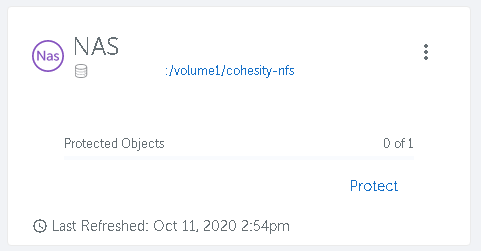
- Once found, select Protect.
- Select the NAS mount point. You can add several sources to one job, but they must be registered as a source first.

- Name the protection job in the Group Name

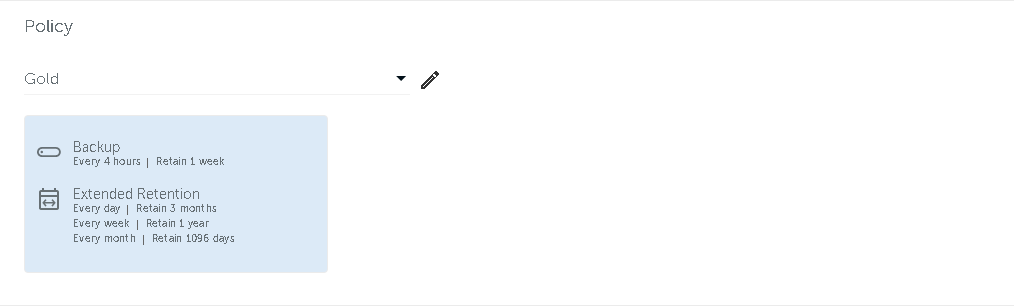
- Select the Protection Policy desired.
- Note: Expedient manages all Protection Policies. If modifications are needed to a Protection Policy, please open a ticket with the OSC.
- Lastly, select the appropriate storage domain (If your account has multiple)

- The Advanced section allows you to modify additional Protection Job settings.
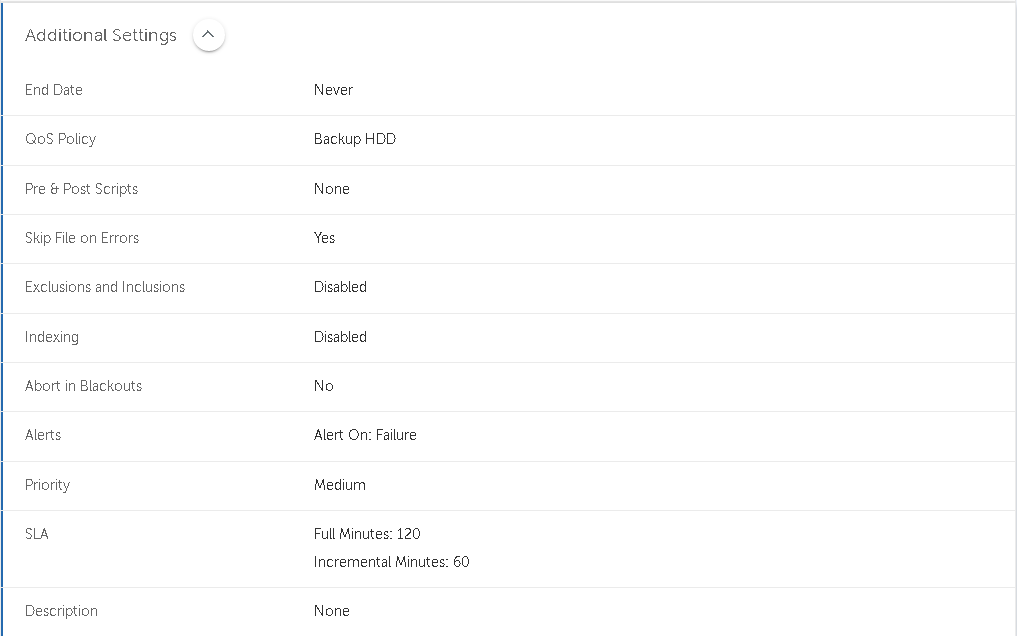
- End Date Utilize this option to set an end date for the Protection Policy.
- QoS Policy Backup HDD is the QoS policy best suited for backups, do not modify this selection.
- Pre & Post Scripts Use this setting to inject pre or post-scripts.
- Skip Files On Errors Utilize this option to choose whether to skip files on errors.
- Exclusions and Inclusions Utilize this option to set any desired exclusions or inclusions.
- Alerts & Priority Utilize this setting to set an email address for backup failure alerts, do not disable alerts if you wish to trigger alerts through the Expedient SMC.
- SLA This setting can be used to set specific SLA thresholds for Incremental and Full backups.
- Select Protect to save your configurations.