Introduction
SQL databases are restored when they need to be returned to a specific point or recovered entirely. You can initiate a restore task to recover the database to the original or an alternate virtual machine.
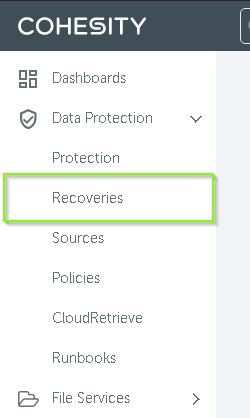
Procedure
- Log in to the Cloud Data Protection system.
- Select the Data Protection Recoveries tab from the navigation bar at the top of the page.
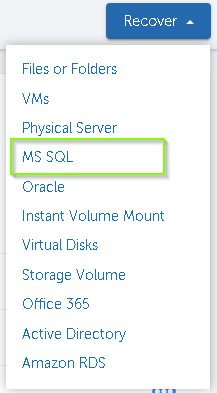
- Select the Recover button and then MS SQL.
- Utilize the search utility to locate the SQL server or database to be restored
- Wildcards and partial names are supported.
- Click the desired database to restore and choose the snapshot you wish to recover from
6. Configure the restore on the Recovery Options page
- Task Name: Select a meaningful name for the recovery task
- Recovered: Confirm the database you wish to recover
- Recover Point: Select the snapshot you want to recover from
- Instance: Select if you are restoring to the Original SQL Host and Instance or another one
- Location: Select where to restore the database to on the server
See Section on Additional Recovery Steps for Always-on Availability Groups
- Name: Select a name for the database
- Recovery: Select if you wish to perform the restore WITH RECOVERY
- Interface: If restoring to EEC, choose Select from Interface/VLANs and select bond0.1930 (bond0.1940 will alternatively be selected on DUB-COHESITY); if restoring to private infrastructure, select Select from Interface/VLANs and select the appropriate bond0.* interface.
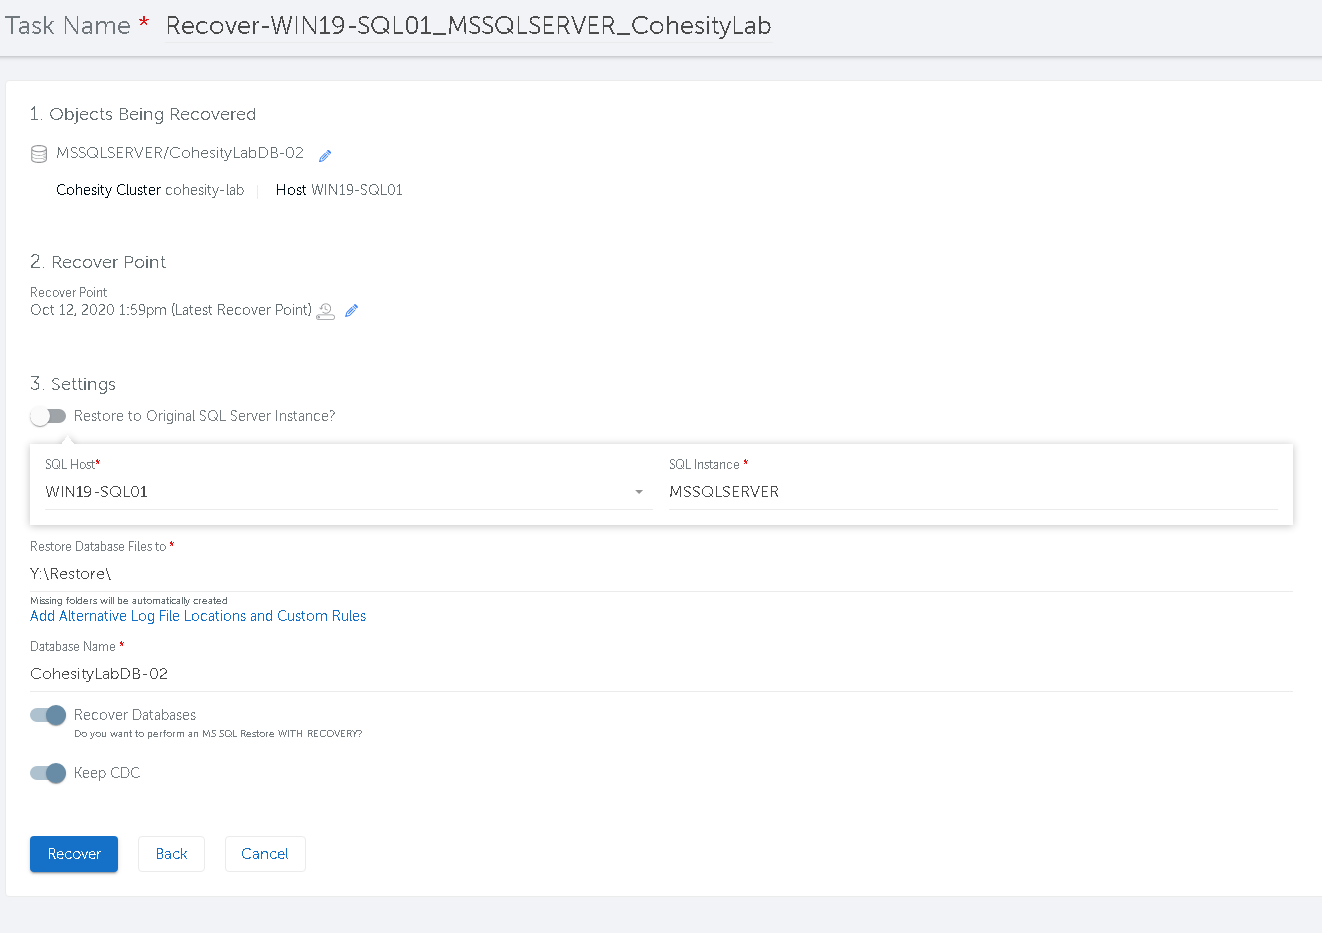
- Select Recover
- Upon the success of the restore, you will have the database restored to the location specified on the Recovery Options page.
Additional Recovery Steps for Always-on Availability Groups
When attempting to restore an AAG by overwriting the original database, it will show the following: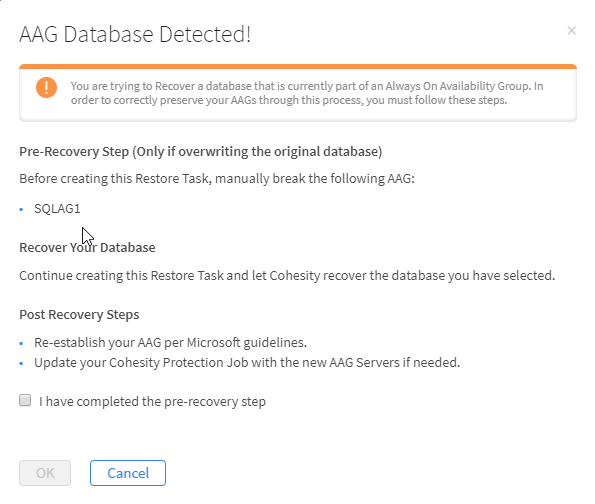
Before you select the Check Box and click OK, you will need to break the AAG manually:
- Log in to a server with SQL Server Management Studio (SSMS) installed with access to manage the applicable database
- Launch SSMS and connect to the database
- Navigate to the AAG by selecting Always On High Availability → Availability Groups → Availability Databases
- Right Click the respective database and select Remove Database from Availability Group.
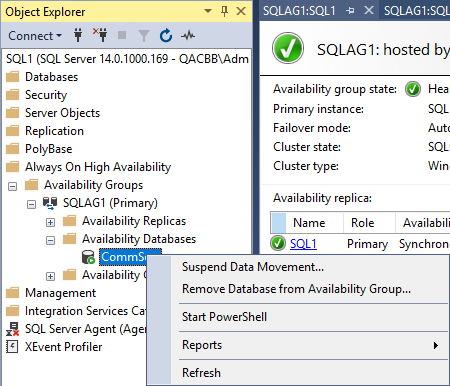
- Confirm you have removed the correct database and select OK
- Verify that the database is no longer listed in the Availability Group and proceed with the restore.
Upon completion of the restore, you may wish to return the database to the Availability Group:
- Log in to a server with SQL Server Management Studio (SSMS) installed with access to manage the applicable database
- Launch SSMS and connect to the database
- Navigate to the AAG by selecting Always On High Availability → Availability Groups → Availability Databases
- Right Click the Availability Databases folder and select Add Database
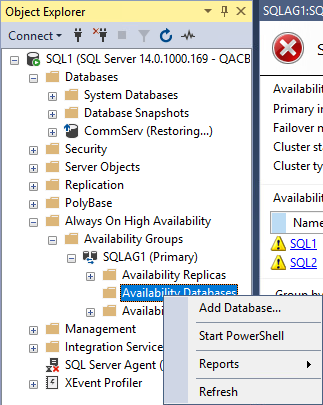
- Step through the menu, setting the appropriate database and replica server.
- Select your seeding method.
- Select Finish.
- Verify the database synchronizes properly between AAG members.
Once you have fully recovered your database(s), make sure to refresh the AAG configuration within the protection job otherwise, backup operations can fail:
- Log in to the respective Cloud Data Protection system
- From the navigation bar at the top of the page, select the Protection → Sources tab
- Locate the SQL protection job, select the Context Menu Icon (
 ), and the Edit

- Select Edit Objects

- Select Refresh, verify the correct databases are showing as recognized, and select Add
- Select Protect