Agent policies specify the Elastic Endpoint Security agent's behavior on each associated machine.
These policies allow for more granular control of each of the following:
Malware protection
Enable / Disable protection
Enable / Disable user notifications
Customize notification contents
Ransomware protection
Enable / Disable protection
Enable / Disable user notifications
Customize notification contents
Memory threat protection
Enable / Disable protection
Enable / Disable user notifications
Customize notification contents
Malicious behavior protection
Enable / Disable protection
Enable / Disable user notifications
Customize notification contents
Event collection
Enable / Disable event collection on Windows
Enable / Disable event collection on MacOS
File
Process
Network
Enable / Disable event collection on Linux
File
Process
Network
Elastic Endpoint Security integration with Windows Security
Enable / Disable registration (disables Windows Defender)
Process
Login to Elastic Endpoint Security. If you need assistance with this, please refer to How to access Elastic Endpoint Security
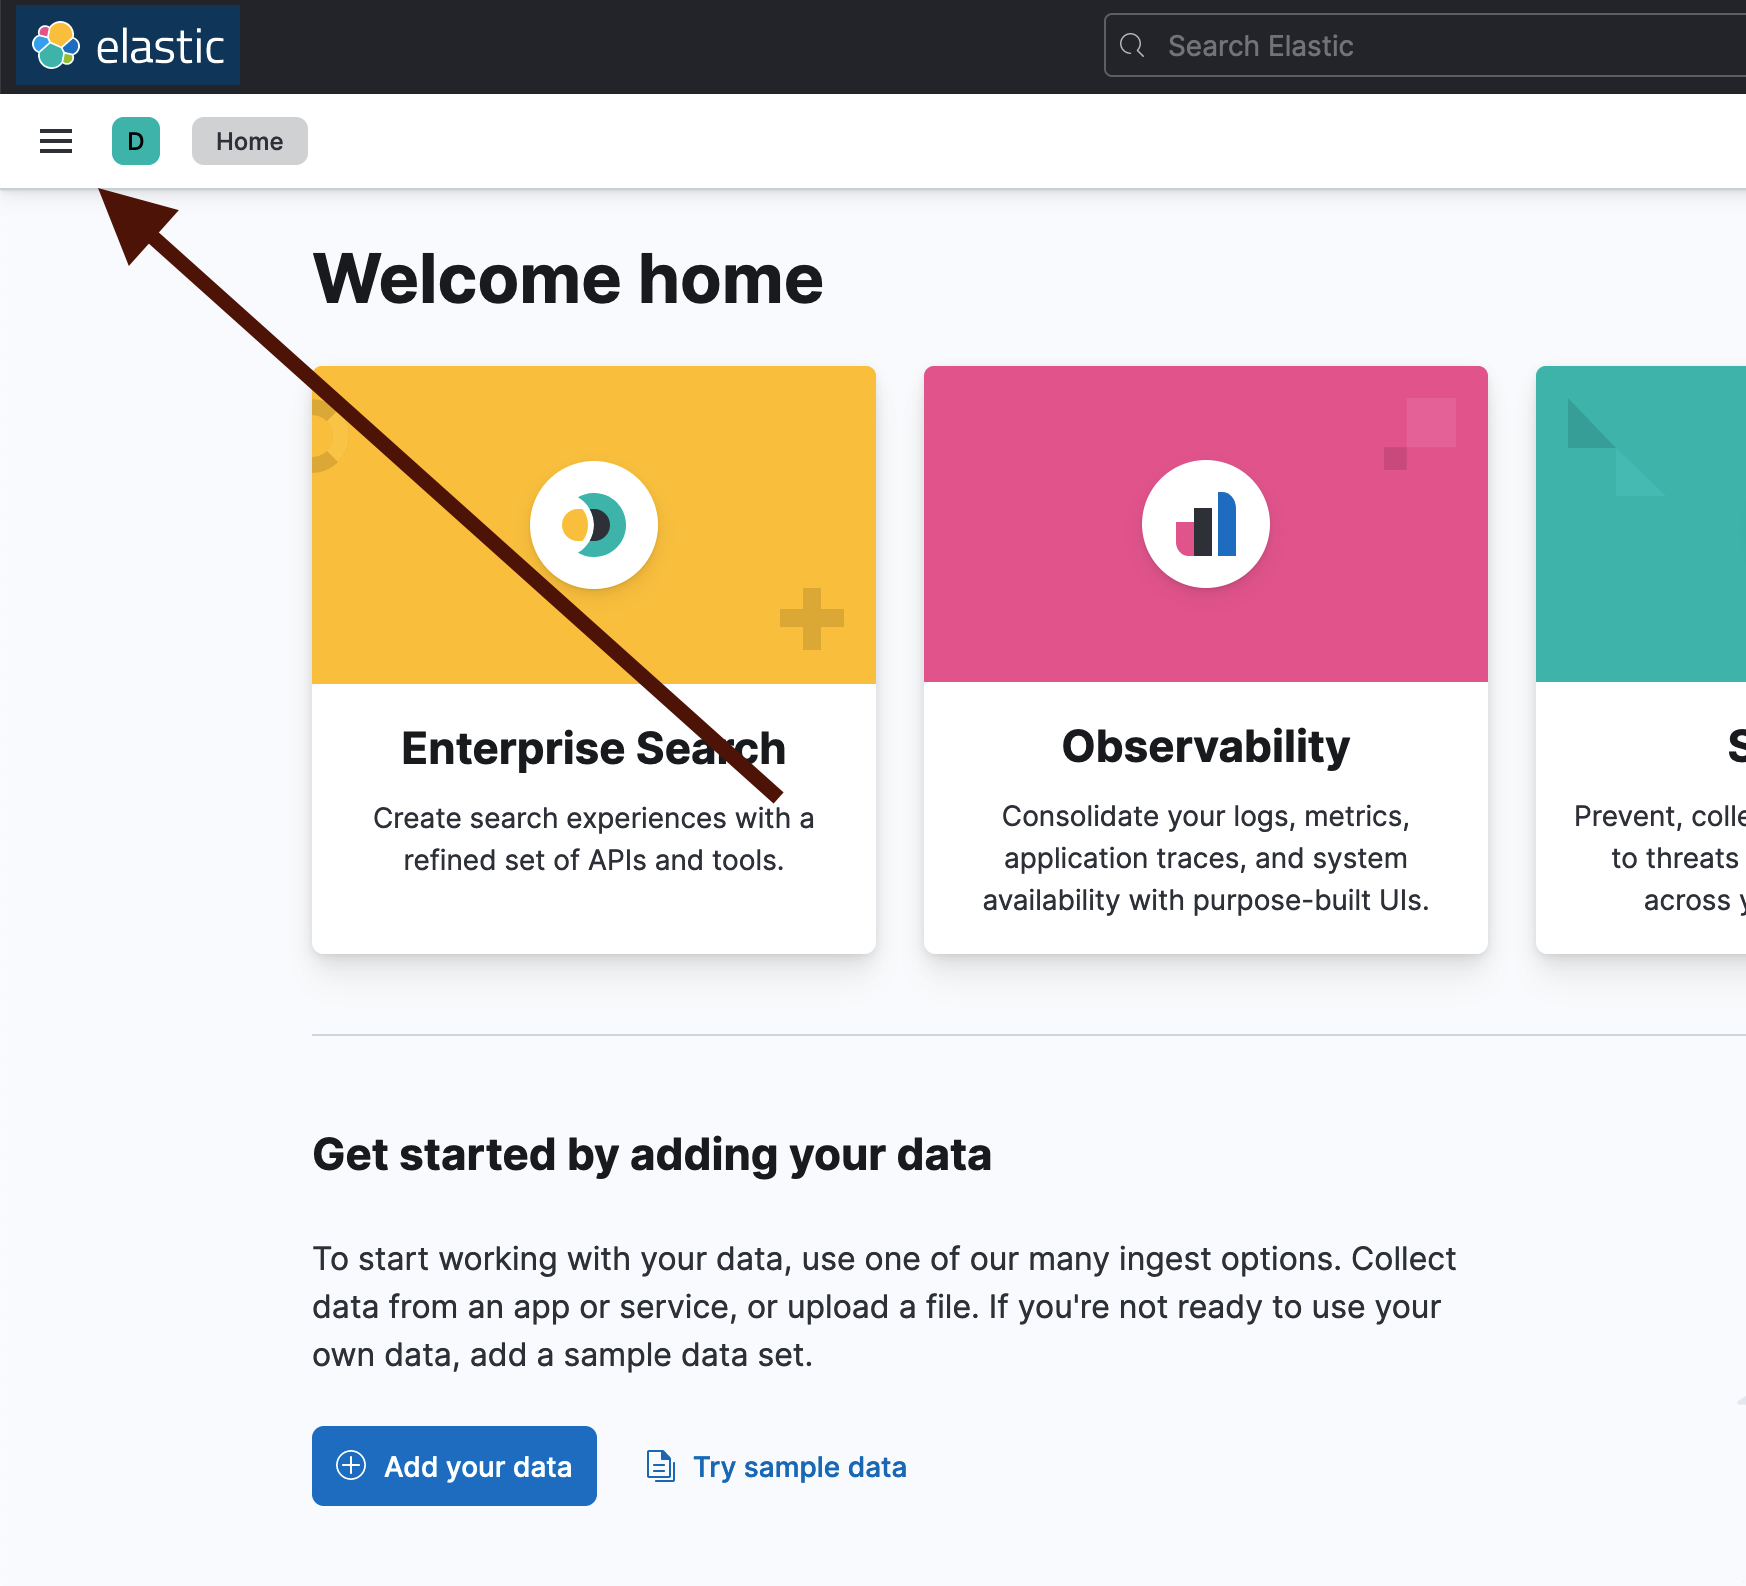
Open the sidebar by clicking on the menu button
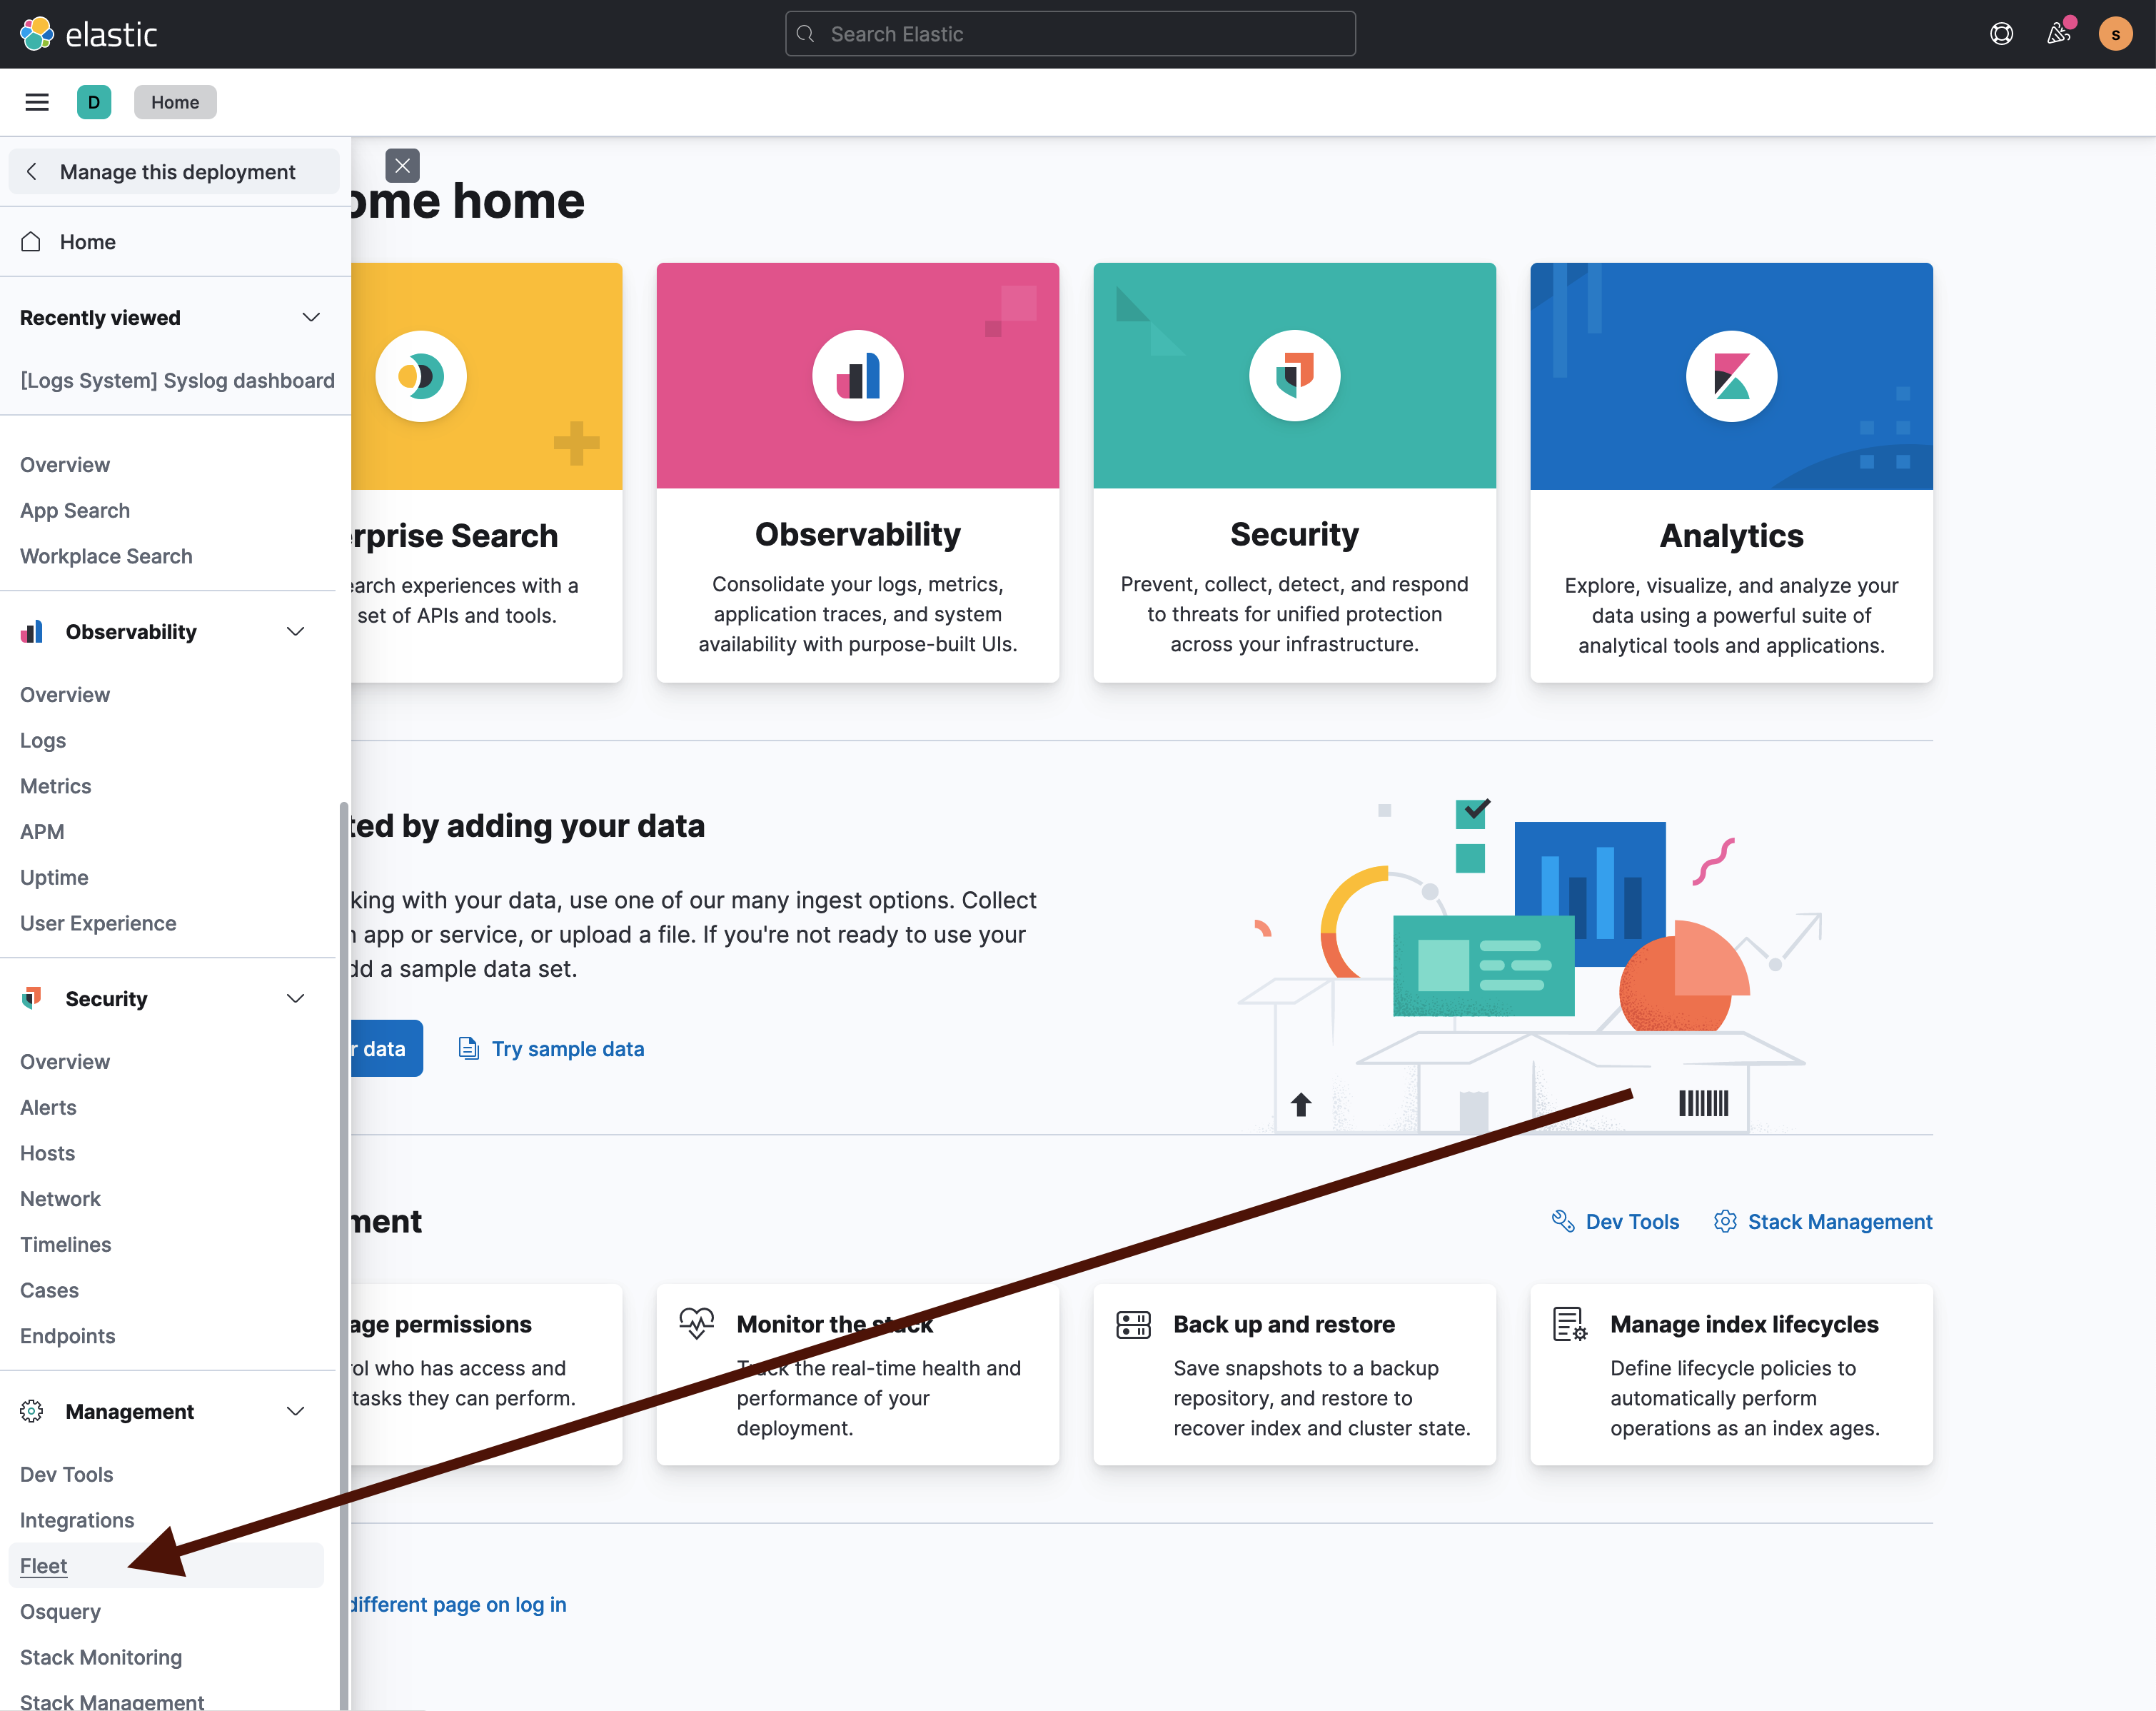
Navigate to Fleet under Management
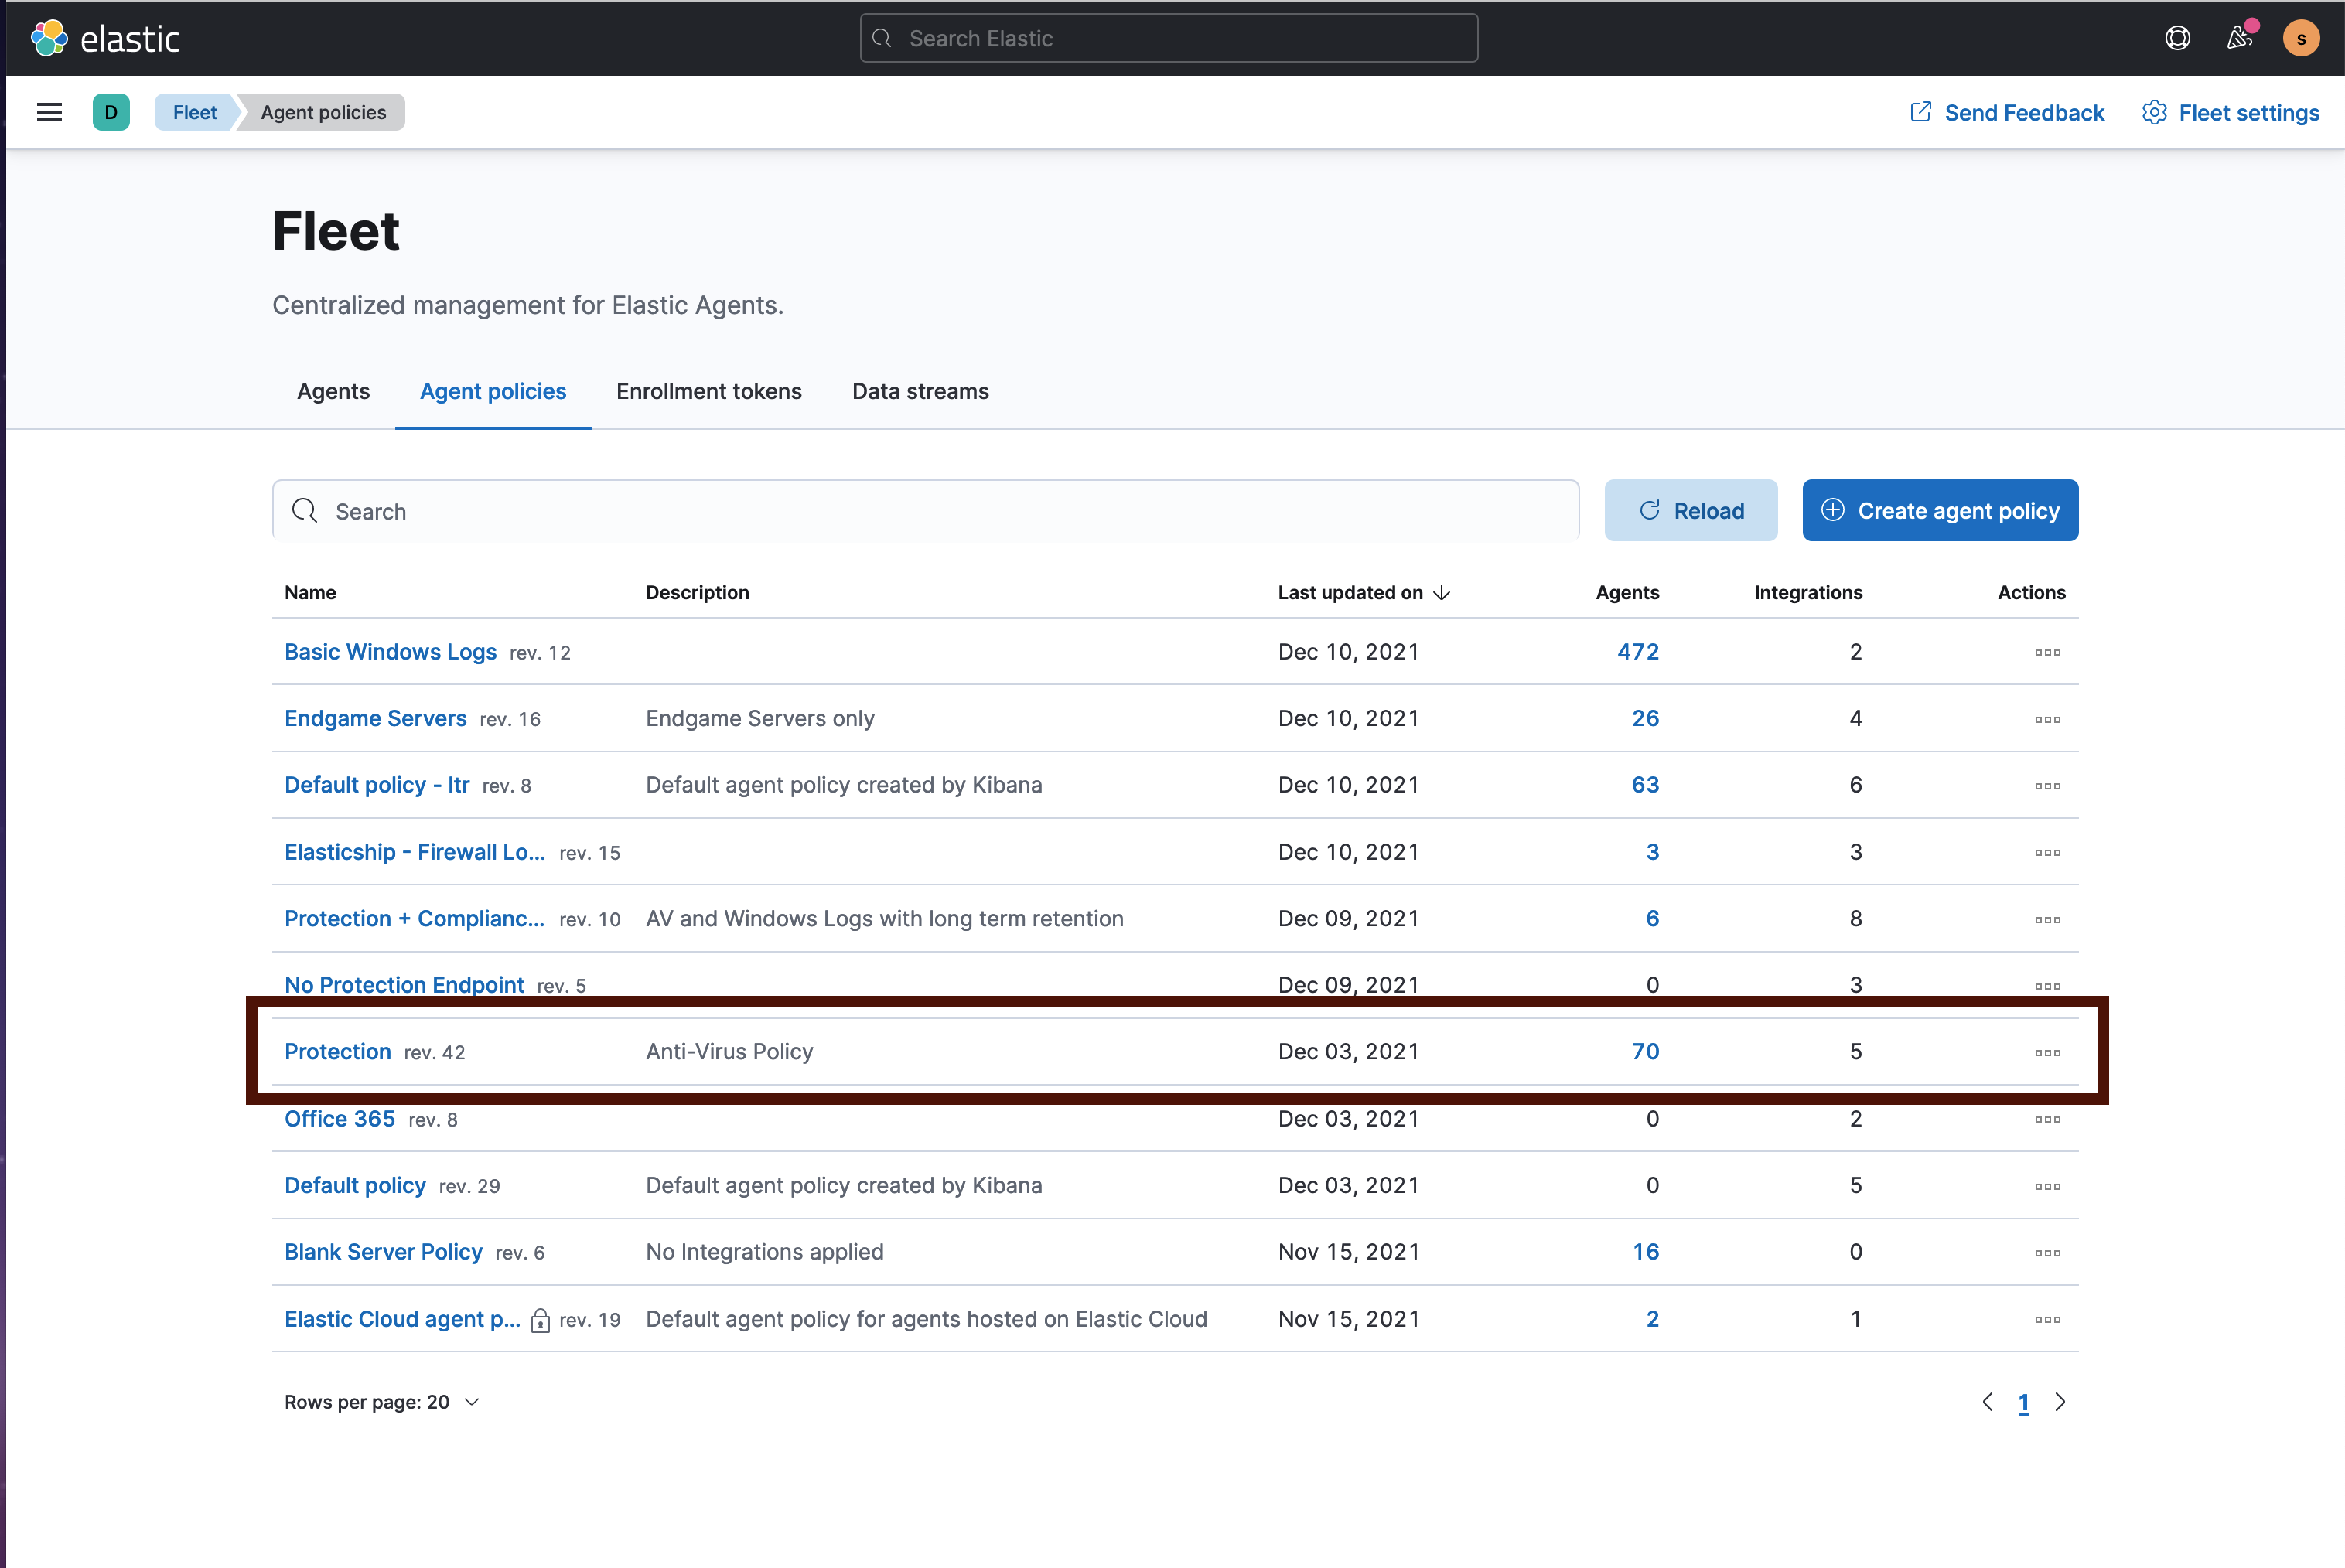
On the Fleet page, select the Agent policies tab

Locate the policy that you would like to adjust. From this page, you are also able to create new policies, as well as duplicate existing policies. Duplication can be helpful if you would like to create a new category of protection that deviates slightly from a current protection policy. In this case, we're adjusting the policy named Protection, but it is important to note that the policy you need to change might have a different name.
On the policy Integrations page, select the Endpoint Security integration.
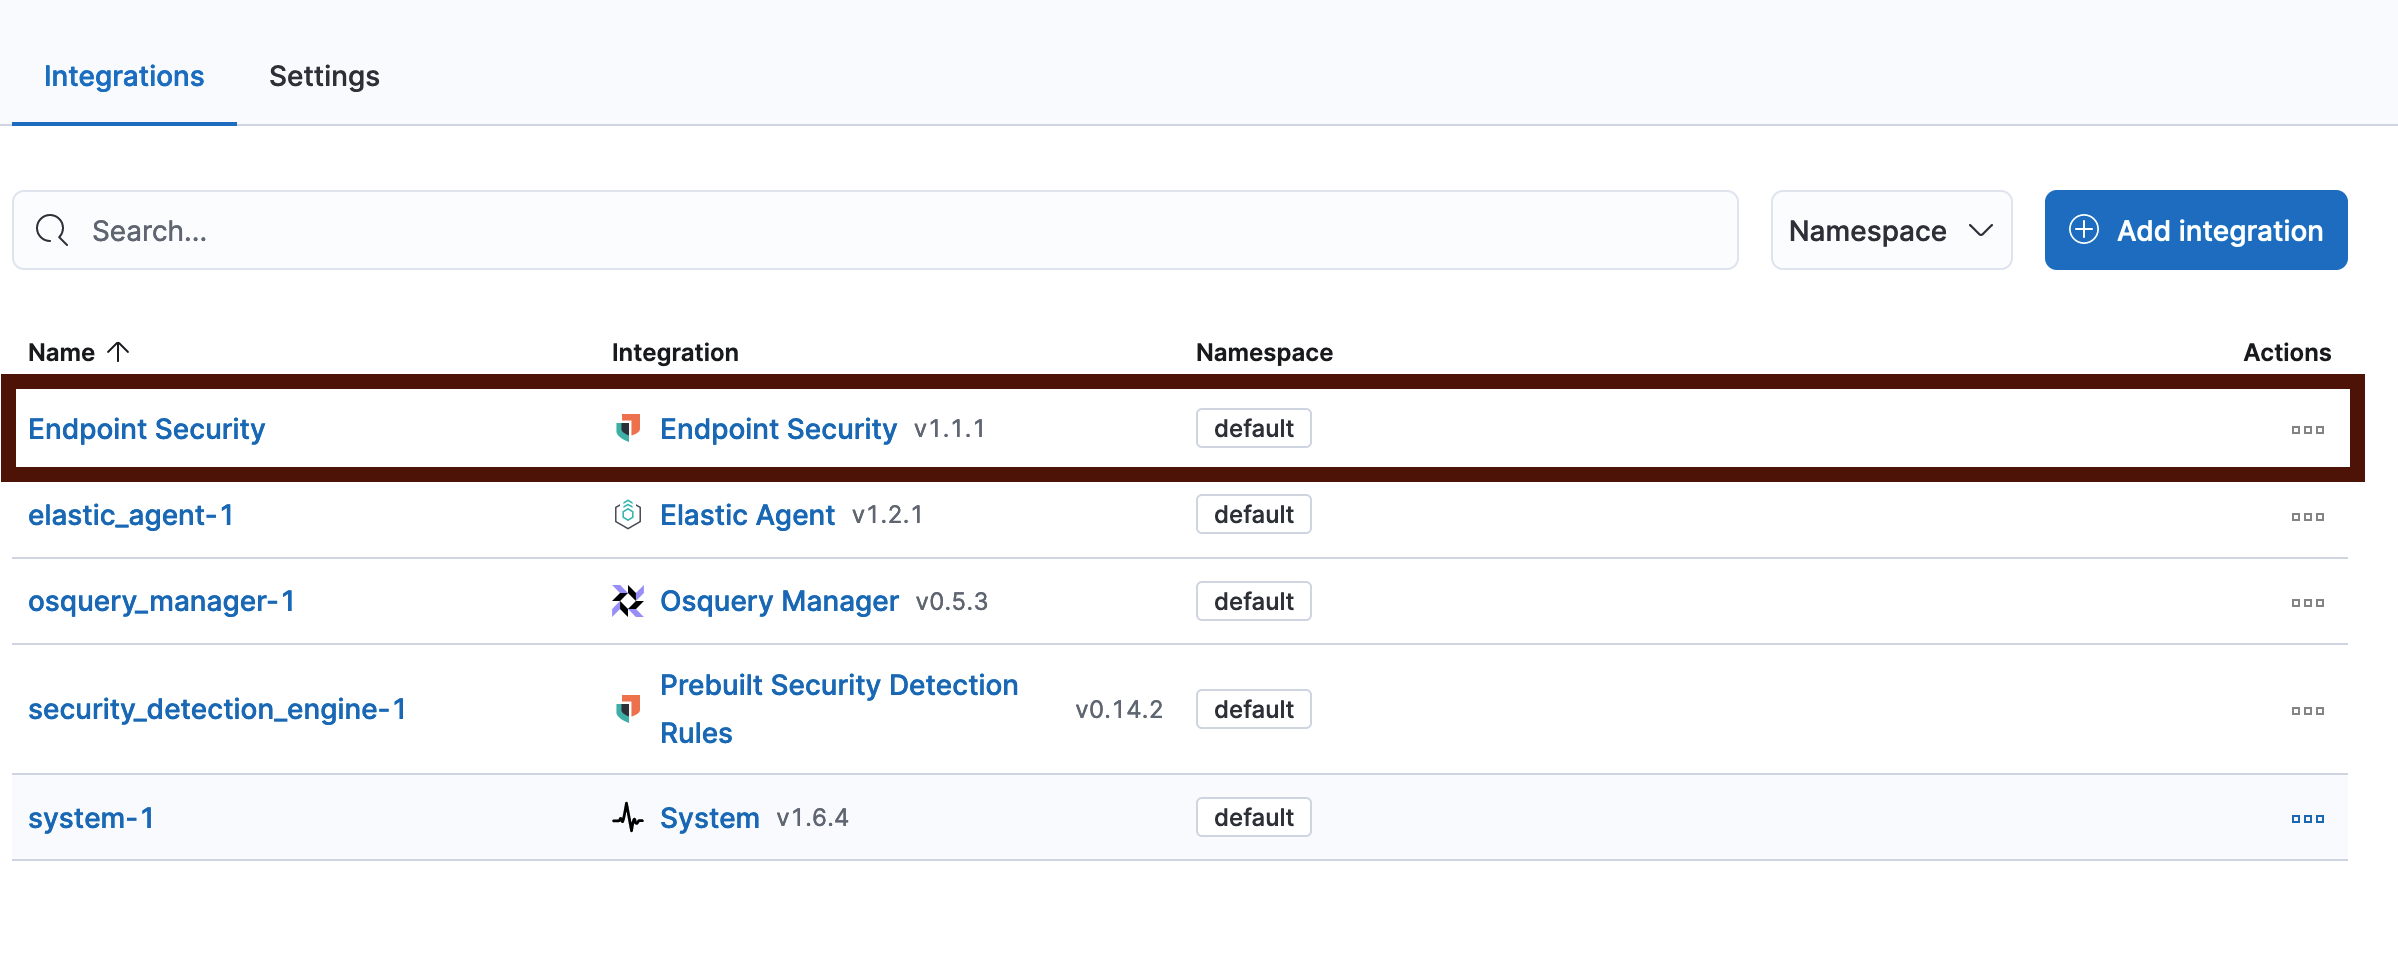
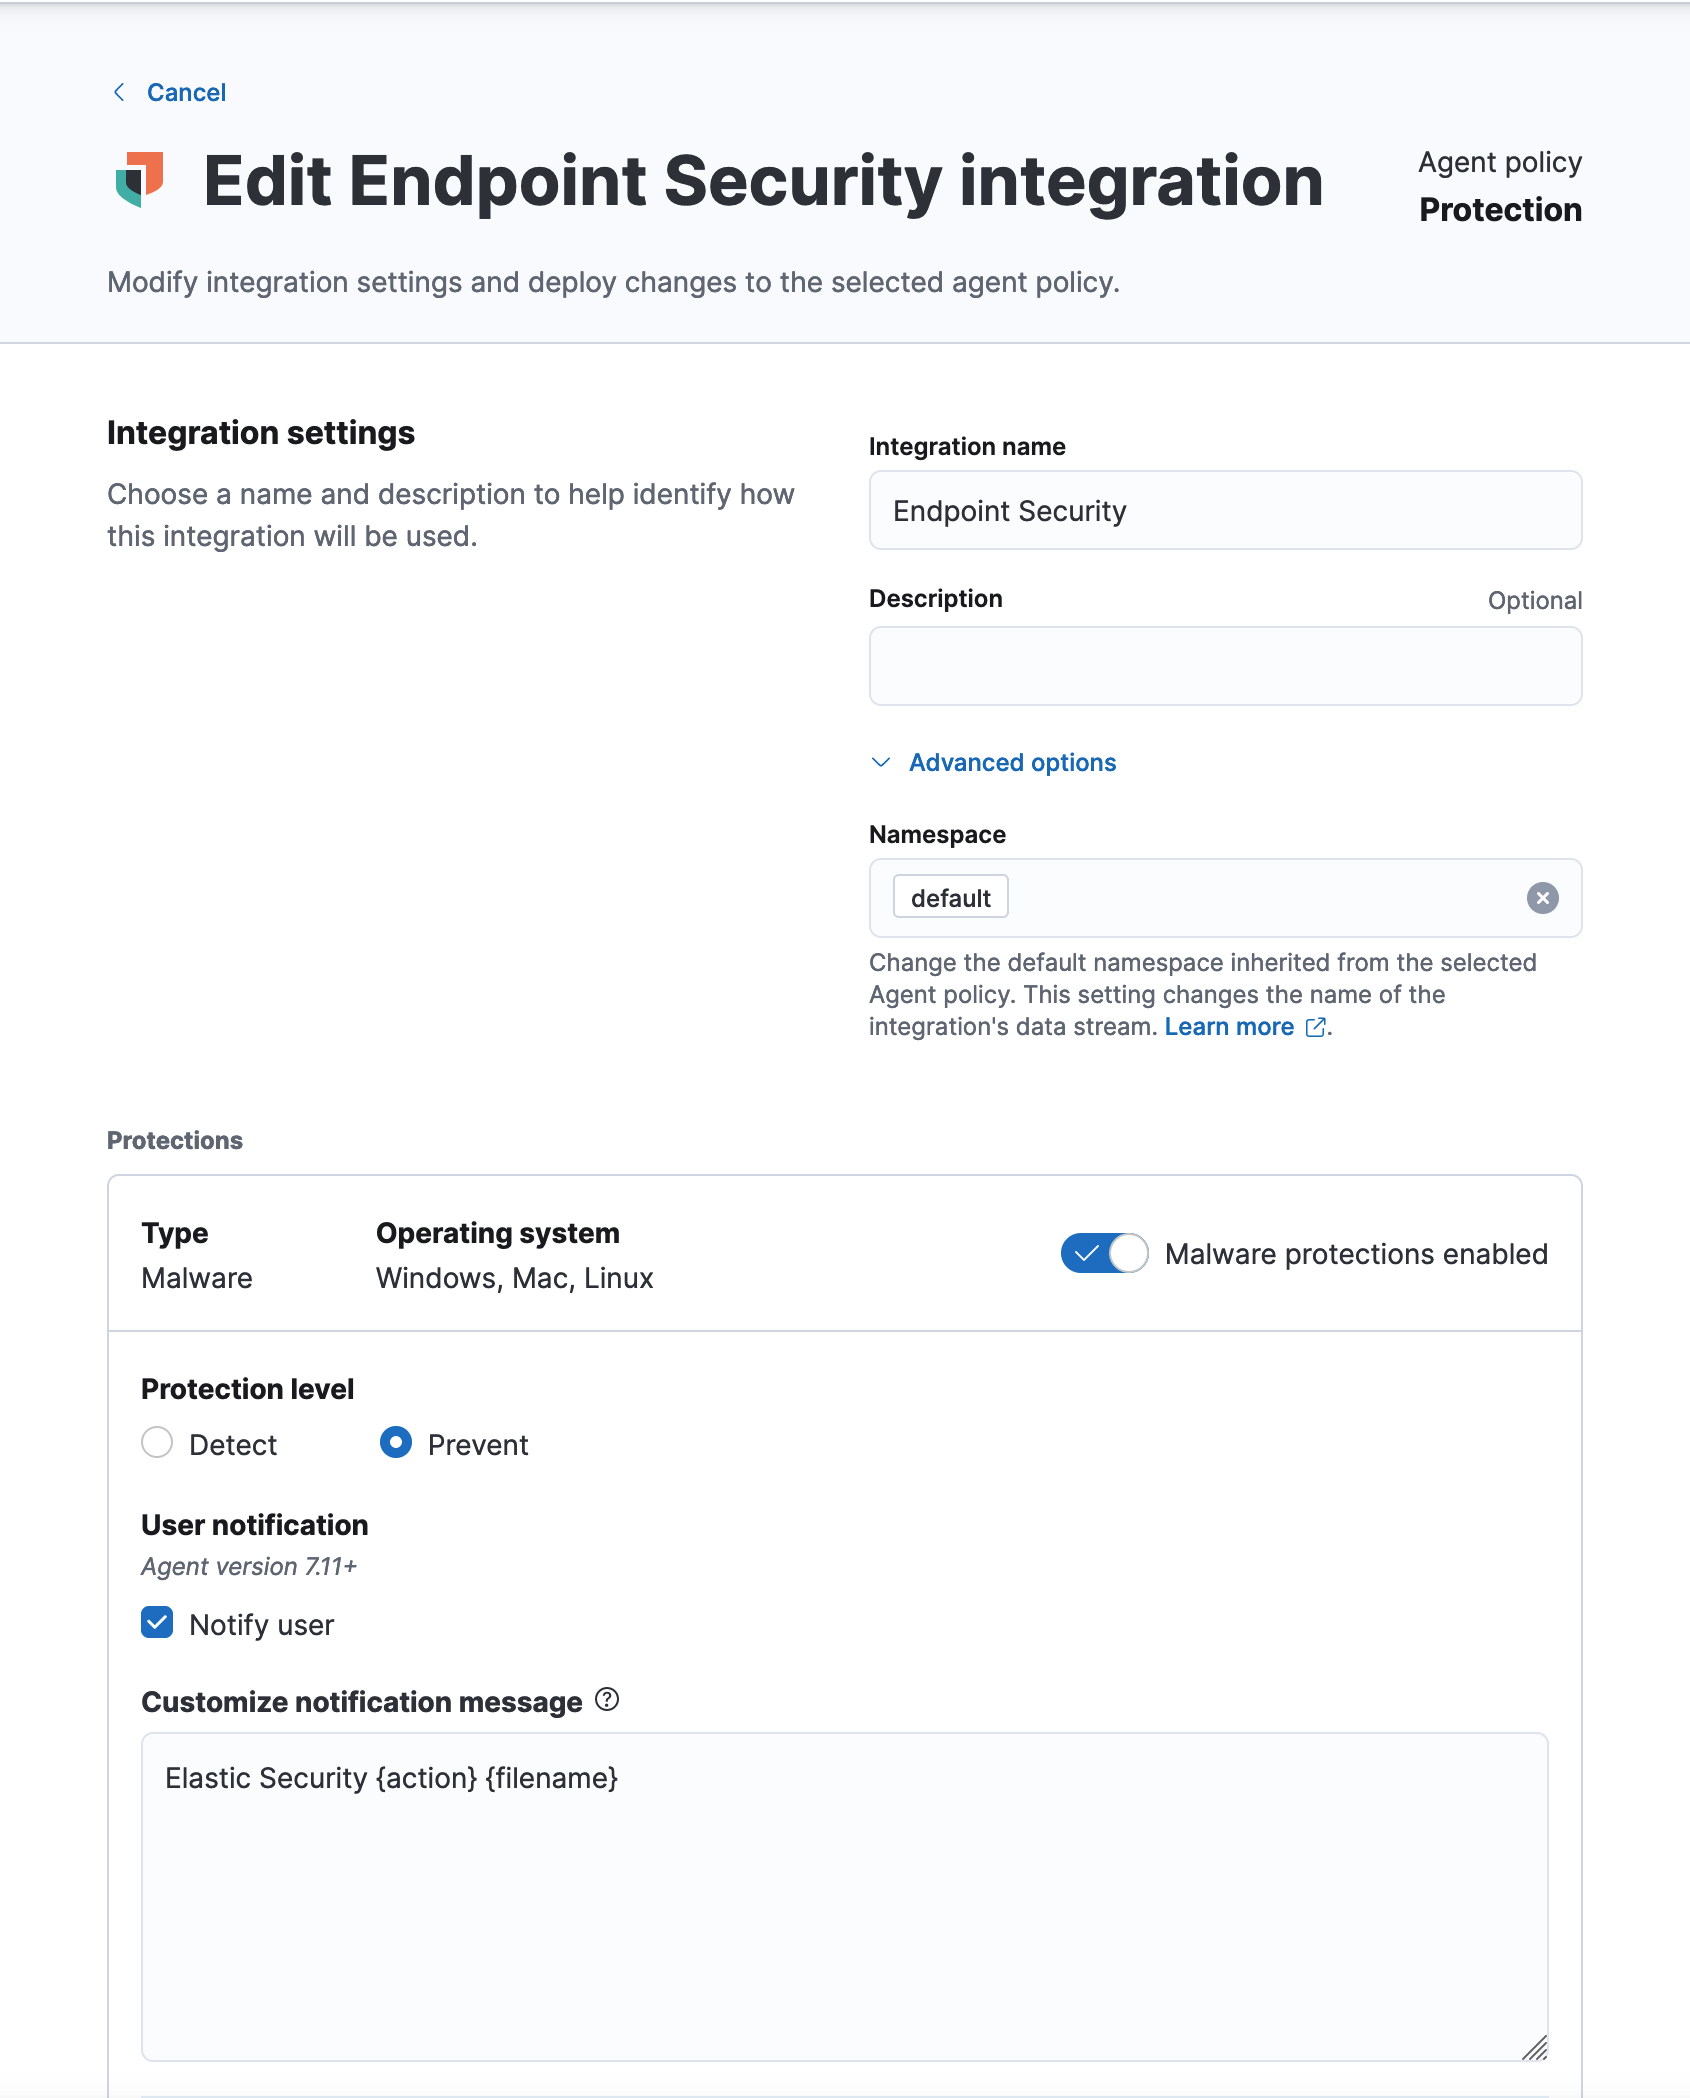
The Edit Endpoint Security Integration page allows you to adjust the behavior of the Endpoint Security agent on each machine associated with the Agent policy.
Assign Policy to Endpoint(s)
Open the sidebar by clicking on the menu button
Navigate to Fleet under Management
Select the host that you want to change the policy for
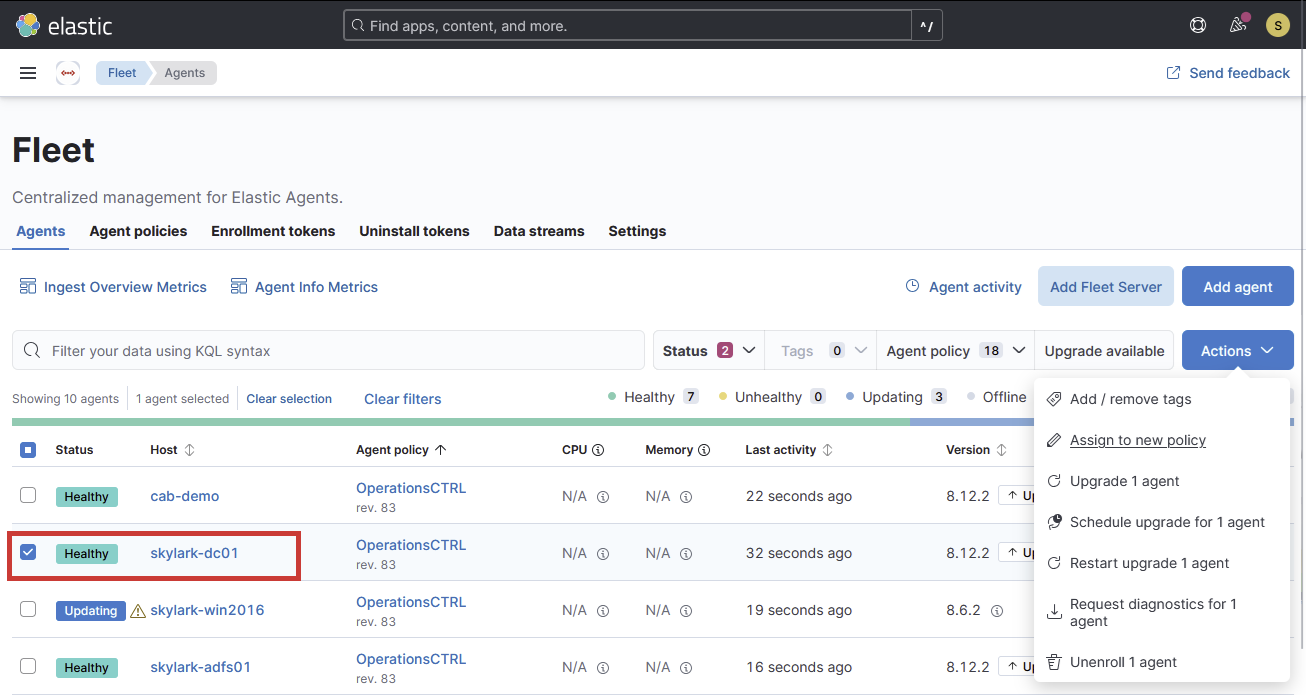
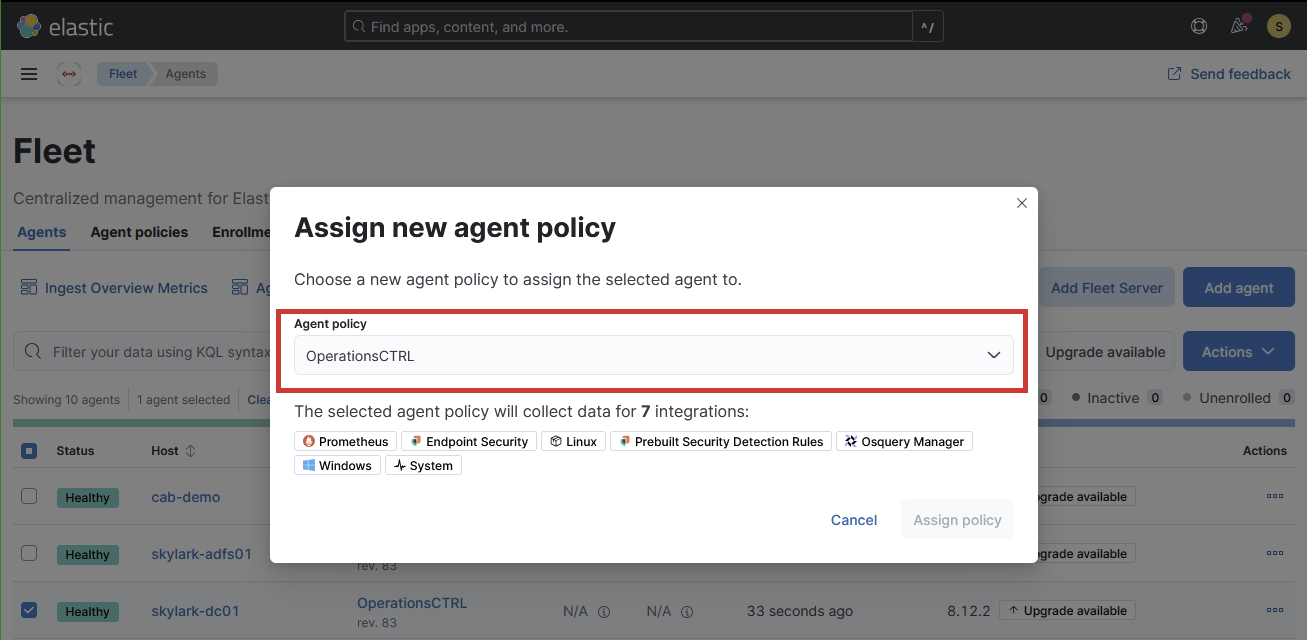
Select Actions and Assign to new policy
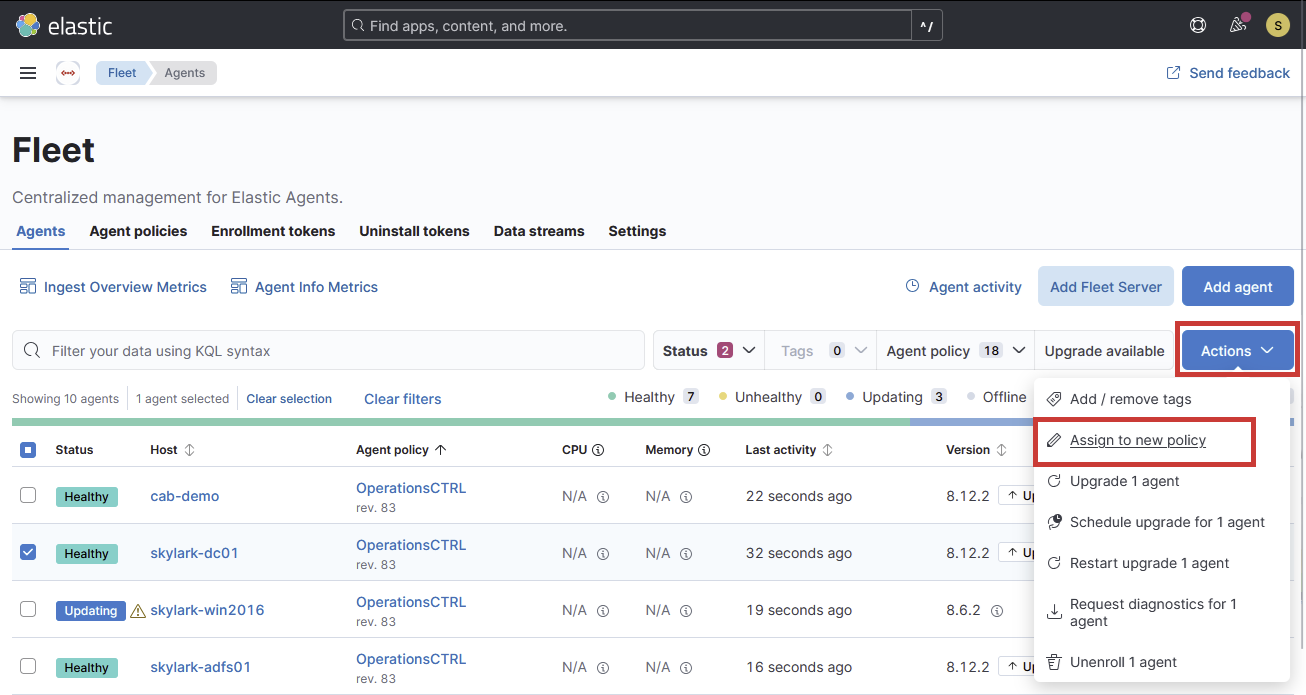
Select the new policy from the drop down menu