DR at Expedient is typically configured and executed entirely through Prism Central, but in some cases, you may need to utilize Production Domains at the Prism Element level.
Planned Failover - Migration
A planned failover (Migration) is initiated from the primary/source side of replication.
After a failover, the target site enables certain VM properties, such as CPU hotplug and Virtual SCSI, by default, if they were configured with a non-default value on the source site in the following cases:
When activating a protection domain on the target cluster.
When restoring or cloning VMs using a snapshot on the target cluster.
The VMs on the target cluster do not boot if the applications or the OS running on them do not support the settings for retaining CPU hotplug and Virtual SCSI properties.
To ensure a smooth failover for VMs that have a non-default value of CPU hotplug and Virtual SCSI properties, upgrade both the source and target clusters to AOS versions that support those properties.
Consideration
The VMs on the remote site are not powered on automatically.
This allows you to resolve any potential network configuration issues, such as IP address conflicts, before powering on the VMs.
You must manually reattach the volume groups that were affected by the migration or restore operation, perform in-guest iSCSI attachment.
If you use the nCLI for attaching volume groups, note that the UUIDs of volume groups change when they are restored at the remote site, and so do their iSCSI target names, which contain the volume group UUID.
For more information, see Volume Group Configuration in the Prism Element Web Console Guide.
Migration to a Remote Site
Log in to the Prism Element web console for the primary site.
From the dropdown menu, select Data Protection.
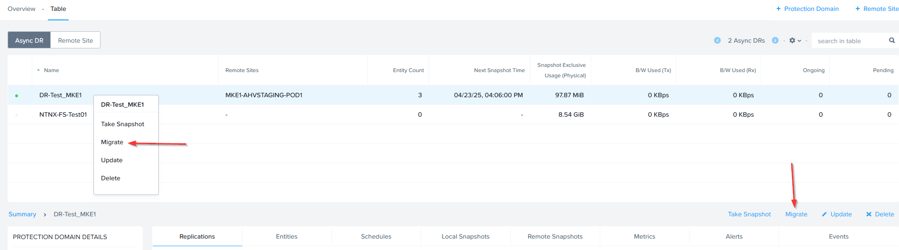
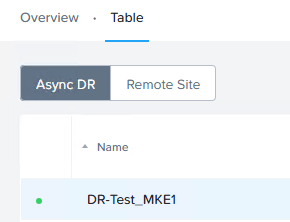
Go to Table > Async DR.
The system displays a list of protection domains configured for asynchronous data replication in the cluster.
Select the protection domain to migrate and click Migrate.
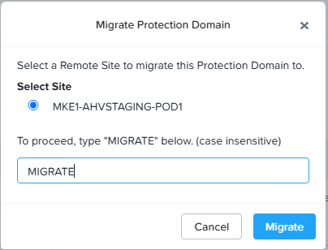
The system displays the Migrate Protection Domain dialog box.
Either right-click the Protection Domain to Migrate or click the Migrate option in the lower right portion of the window.
Select the site where you want to migrate the protection domain, and type MIGRATE in the text box.
Click Migrate button to begin.
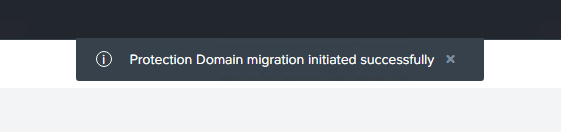
b. A task will begin, and a banner will pop up noting that the Protection Domain migration was started successfully.
Migrating a protection domain does the following:
Creates and replicates a snapshot of the protection domain.
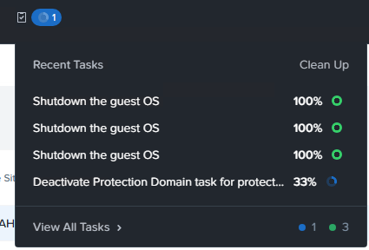
Powers off the VMs on the primary site.
Creates and replicates another snapshot of the protection domain.
Unregisters all VMs and volume groups and removes their associated files.
Marks the primary site protection domain as inactive.
Restores all VM and volume group files from the last snapshot and registers them with the same UUIDs at the remote site
Marks the remote site protection domain as active
The VMs in the Protection Domain are deleted from the primary cluster and only present on the remote/target cluster
VM Shutdown Note
The data protection service waits for 5 minutes for the VM to shutdown. If the VM does not get shutdown within 5 minutes, it is automatically powered off.
Please remember that the VMs are NOT automatically powered on after a failover. All of the VMs in the Protection Domain must be manually powered on.
Migrate Back to Source Site
After a failover (planned or unplanned), you will likely need to eventually migrate back to the source cluster.
When performing Protection Domain failover, reverse replication is NOT automatically configured back to the paired remote site. Local snapshots of the Protection Domain are taken on the new source cluster, but those snapshots are not replicated and must be set up again manually.
To set up snapshot replication to the remote site, you must configure a schedule on the Protection Domain, similar to configuring a scheduling when creating the Production Domain in the first place.
Log in to the Prism Element GUI of the now primary/source cluster for the Protection Domain.
The ‘Active’ Protection Domain will display a green dot icon next to the name.
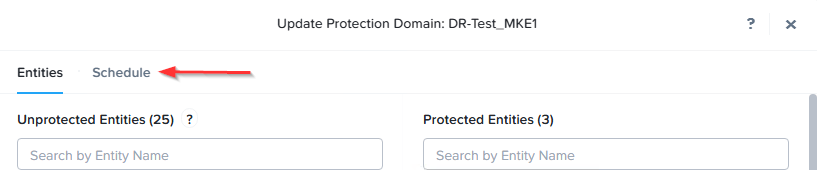
Right click the name of the Protection Domain and select Update.
The update Protection Domain window will open and display the protected entities in the Protection Domain. Click the Schedule tab to configure a new remote replication schedule.
Click the New Schedule button and configure the required schedule to replicate snapshots to the new remote site. (The previously ‘Active’ site)
Configure the schedule as needed and click Create Schedule.
Data Protection will now show replication back to the remote site.
