Underlying Products
Zerto Virtual Manager (ZVM) is the management service for the Zerto Virtual Replication (ZVR) platform, which is an integral part of Expedient's Host-to-Host Virtual Server Replication service. The ZVM is a Windows-based application that provides installation, management, and orchestration services for Zerto and the corresponding Virtual Replication Appliances (VRA). ZVM is also responsible for site pairing and acts as a management interface to the virtual hypervisor environment.
Preconditions
This informational document assumes the following preconditions:
- Fully configured Zerto Virtual Replication installation.
- ZVM Installed on local and pair site
- VRAs Installed on local and pair site on each virtualization host
- Customer site paired with one of Expedient's sites
- Access to Zerto Panel in web browser from the protected site
PROTECTING VIRTUAL MACHINES
VPGs protect 1 or more virtual machines and multiple VPGs can be created. A VPG must include at least 1 virtual machine to start configuration. After creating a VPG you can add or remove virtual machines later.
Creating a VPG
NOTE: Expedient recommends that VPGs have no more than 20 VMs.
1, Select the "VPGs" tab to list all of the current VPGs at the site.
2. Click on the "New VPG" button.

3. Enter a VPG Name
- Please start the VPG name with your customer name to help our delivery or support personnel easily identify your VPGs
<CustomerName> - <type of description>
<type of description> = describe the type/function of the server(s) in the VPG (ex. SQL Servers).
- Priority should be left at default Medium
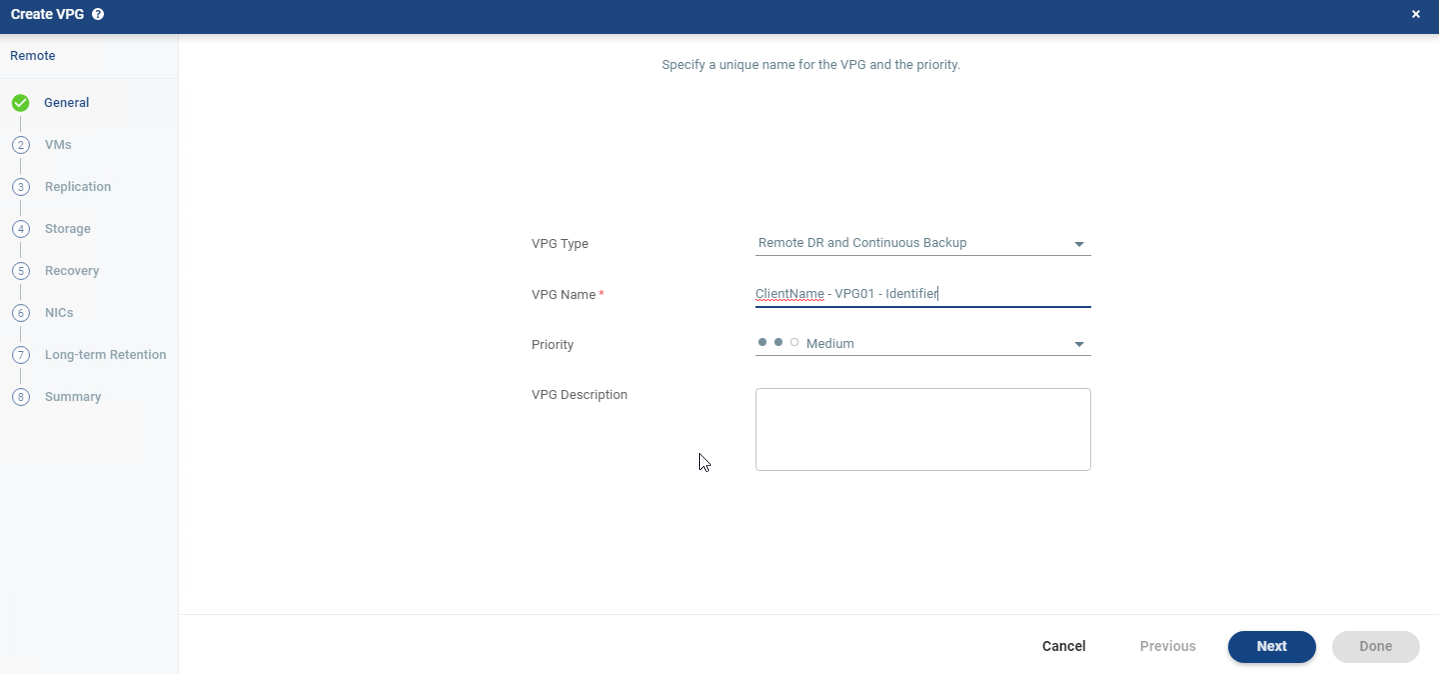
4. Then Select 'NEXT.'
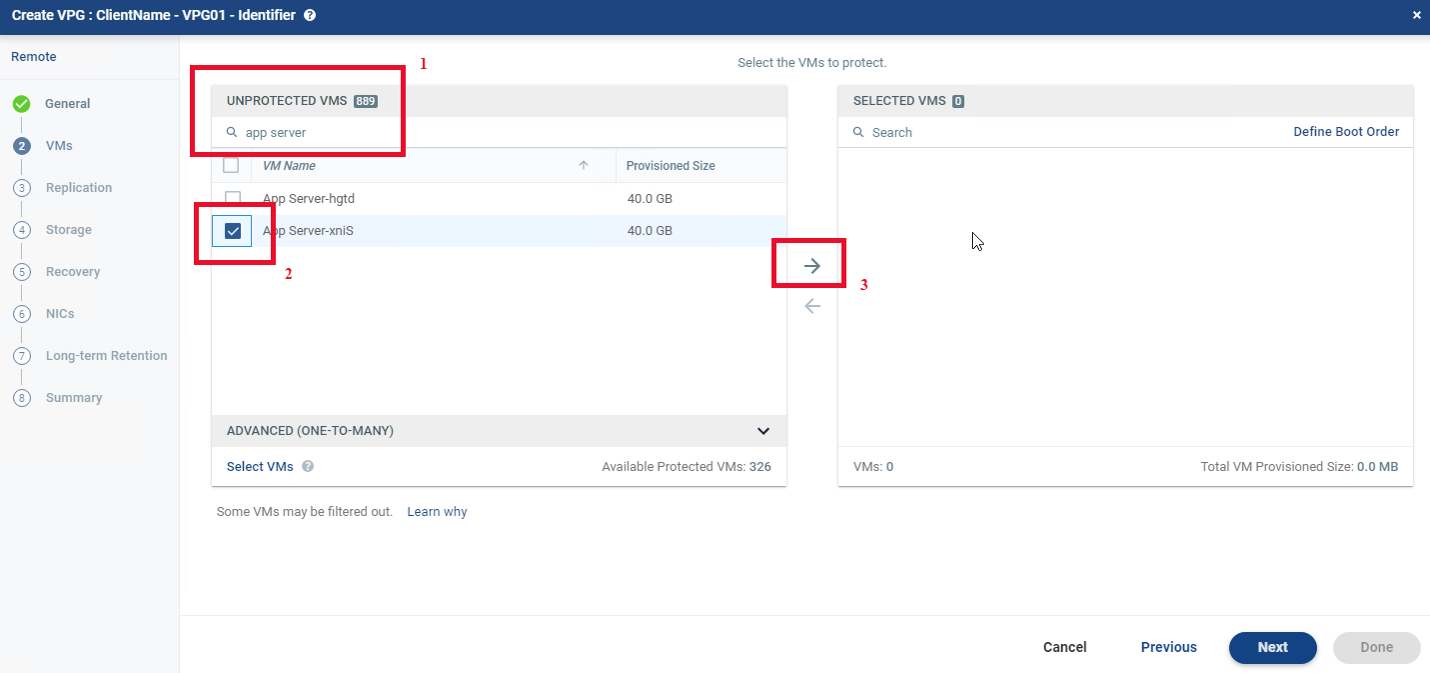
5. Select the VMs that are to be replicated from the 'Unprotected VMs' list and move them to the 'Selected VMs', and select 'NEXT.'
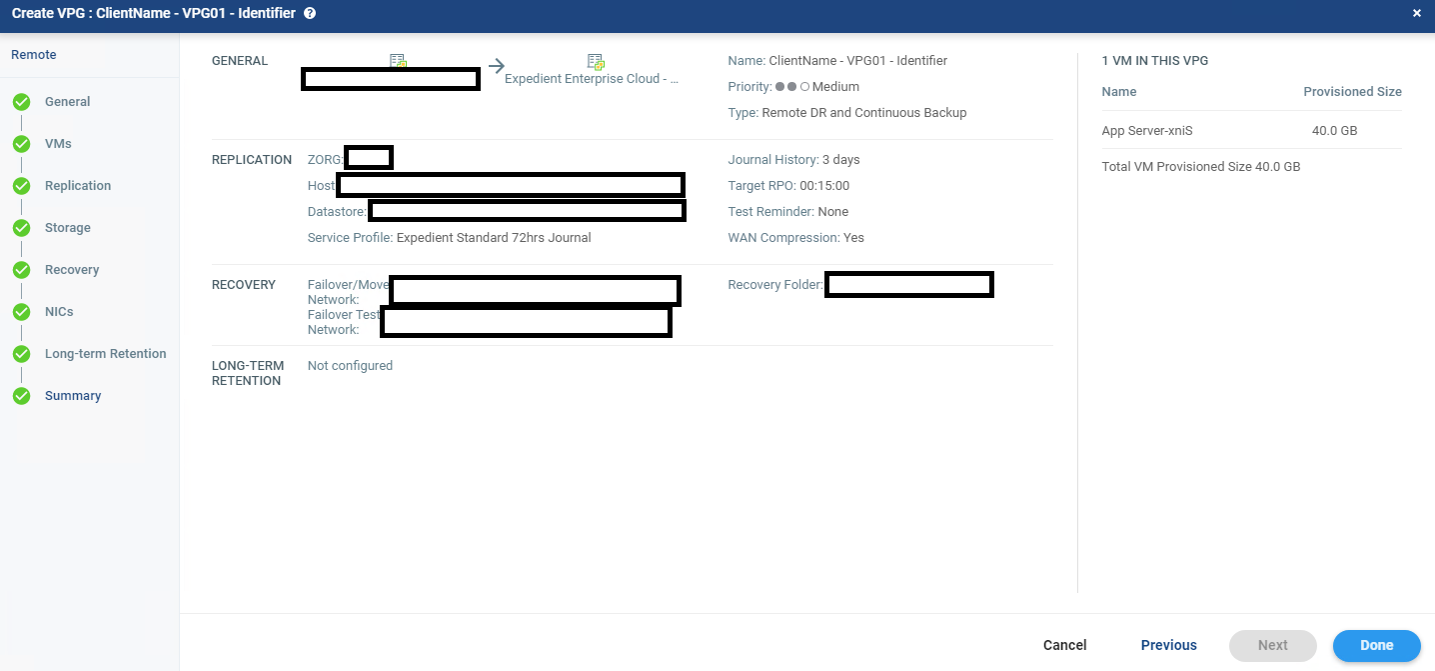
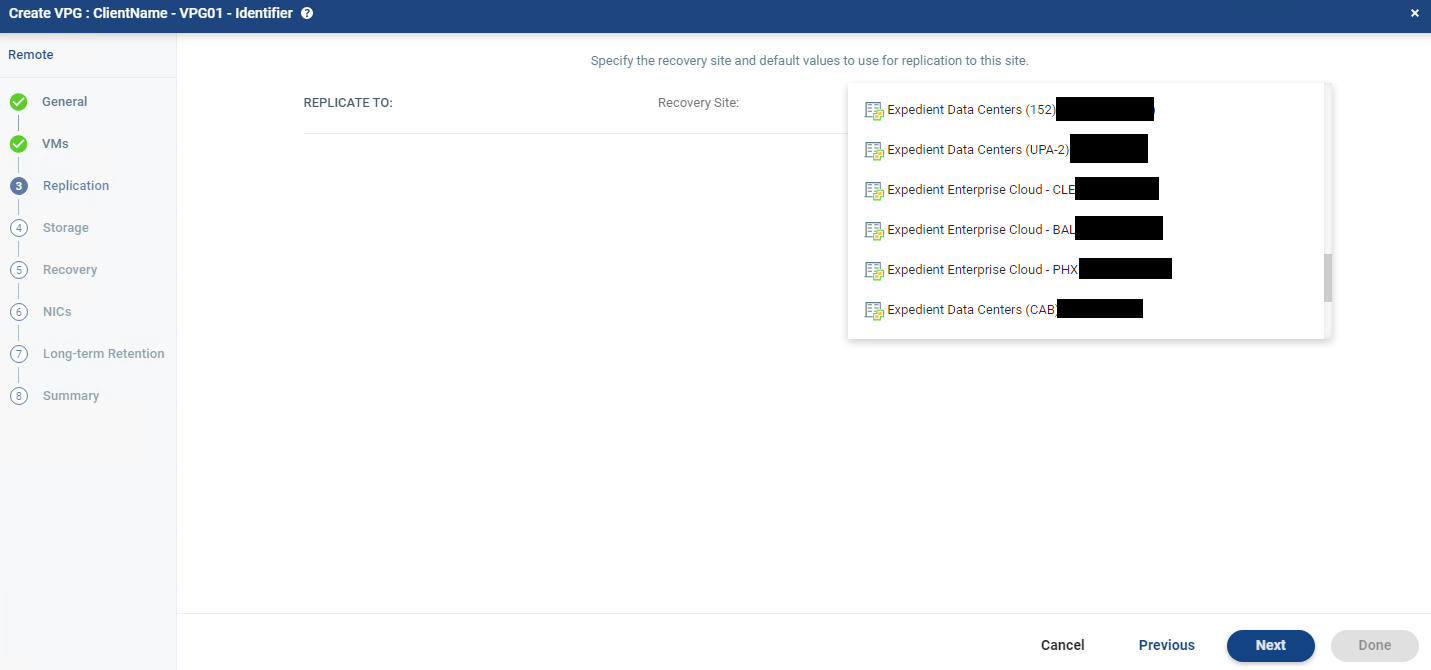
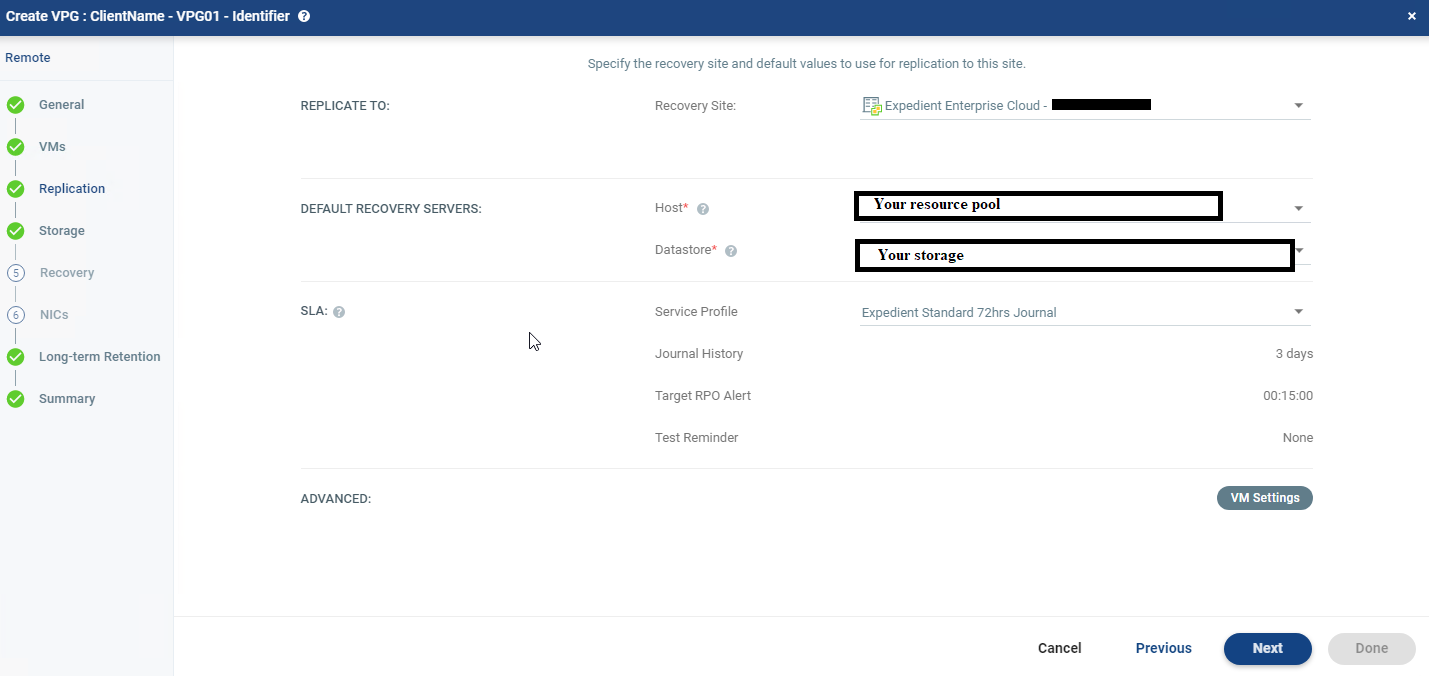
6. Configure the options for Replication and Select 'NEXT."
- Recovery Site: This will only have the selection of the Expedient data center that was currently paired with during the Zerto installation.
- ZORG: This will only have a selection of your Company name that was configured by an Expedient engineer on the Expedient side.
- Host: Select your vColo Resource pool at the target datacenter.
- Datastore: Select your datastore at the target datacenter.
- i. If there is more than one datastore, select the most common one, as this is just a global setting for the VPG that propagates down to the VMs. but each volume can be modified in the next step
- e. Service Profile: Leave at Default 'Expedient Standard 72hrs Journal'
7. Then Select 'NEXT.'
8. Each Volume can be modified for Thin, Swap(Temp Data), RDM, Preseeding or point to a different Datastore
- 'Thin' will be auto selected if source volume is Thin Provisioned or not selected if source volume is Thick Provisioned
- Most cases leave this selection auto populated so target volume is provisioned same as source
- 'Temp Data' is selected if the volume is going to be a Swap Disk in the cases of SQL servers
- The Recovery Volumes Location(target Datastore) was propagated from the previous step
- This can be changed per volume by selecting the Volume and then selecting 'EDIT SELECTED.'
- Each volume can point to a different target datastore
- Each Volume can point to a 'Preseeded volume.'
- This is used only if volumes are already located at the target location iii. Each Volume can point to an 'RDM.'
- This requires special and extensive configuration on the Expedient side
9. Modify the volumes if needed, then select 'NEXT.' 
10. Configure the options for Recovery and select 'NEXT.'
- Failover/Move Network: Select a Network at the target datacenter.
- If there is more than one network, select the most common one, as this is just a global setting for the VPG that propagates down to the VMs. but each VMs network can be modified in the next step
- Failover Test Network: Select a Test Bubble Network at the target datacenter.
- If one has been created otherwise select a network that exists at the target datacenter
- Recovery Folder: Select your VM folder at the target datacenter.

11. Each NIC can be modified for the Failover/Move Network, Test Network, or Change of IP
- The Failover Network and the Test Network were propagated from the previous step
- To change either network, Select the NIC and select 'EDIT SELECTED.'
- You can have the IP Change on the NIC during a Failover and/or during a Test
- To change IP, Select the NIC and select 'EDIT SELECTED.'
12. Modify the NICs if needed, then select 'NEXT.'

13. Select 'NEXT' on the Long-Term Retention 
14. Confirm everything looks right on the SUMMARY screen and select 'DONE.'