Overview
Description
This informational document is intended to guide an Expedient client who subscribes to Host-to-Host Virtual Server Replication through the process of initial installation and configuration of the underlying products used to deliver this Expedient service.
Underlying Products
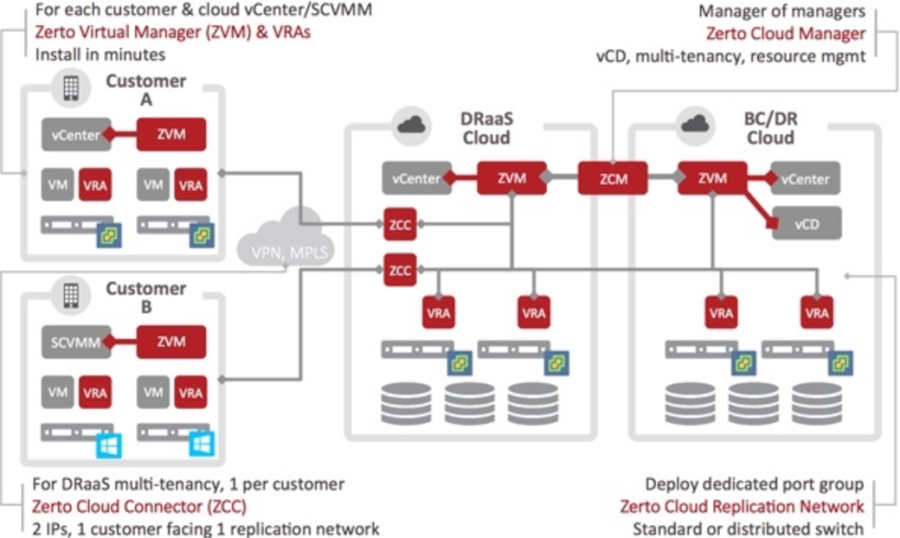
Zerto Virtual Manager (ZVM) is the management service for the Zerto Virtual Replication (ZVR) platform, which is an integral part of Expedient's Host-to-Host Virtual Server Replication service. The ZVM is a Linux-based application that provides installation, management, and orchestration services for Zerto and the corresponding Virtual Replication Appliances (VRA). ZVM is also responsible for site pairing and acts as a management interface to the virtual hypervisor environment.
Preconditions
This informational document assumes the following preconditions:
An active VPN tunnel or MAN connection with bidirectional access to the protected Zerto Virtual Manager (ZVM) site and ZVM replication site.
Zerto Replications Appliances (ZRAs) have been established, and they are passing traffic.
A Zerto Cloud Connector (ZCC) or Zerto Virtual Manager (ZVM) IP address has been provided by Expedient.
The source environment is managed by vCenter (standalone ESXi is not supported)
Permissions:
Administrative access to the local vCenter server.
Root access to the local ESXi servers.
VMware virtual machine hardware version:
The VM source and destination host servers (ESXi) must support the virtual machine hardware version.
Zerto Virtual Manager Appliance (ZVM Appliance) Requirements
vCenter 7 / 8
16 GB of RAM
8 vCPUs
180 GB of available disk for deployment
Installation
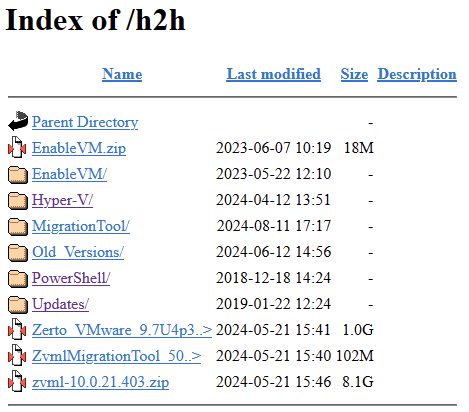
Download
The Expedient public download site changes over time. Thus, the file contents and directory structure may change periodically and not accurately reflect the image within this document. Therefore, please download the correct file as your Expedient technician or engineer directs.
***Contact your Project Manager for credentials and download location if this has not already been provided.
Download the latest Zerto archive file (unless otherwise directed).
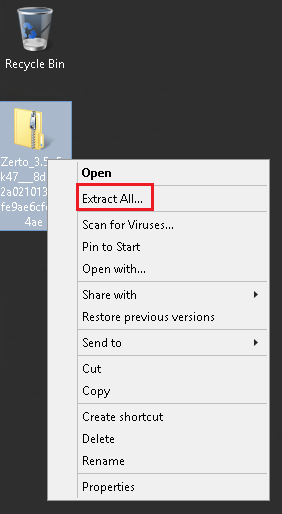
Once the archive file completes downloading, extract the archive files.
The archive is of compression type ".zip." Therefore, the native Windows Server archive or any third-party archive extraction tool will work.
Deploying the ZVMA
Login to the vCenter to be used as a replication source.
Navigate to the host or cluster where you want to deploy the ZVM Appliance. Right-click the host or cluster and select Deploy OVF Template.
On the first page of the Deploy OVF wizard, select the Local File radio button and click Upload Files. Navigate to where you extracted the Linux ZVM zip file and select the OVA file , then click Open.
After the wizard validates the file , click Next.
Give the appliance a name appropriate for your environment and make sure that the proper deployment folder is selected. Click Next.
Select the proper compute resource for the ZVM Appliance, either a host or a cluster if you have DRS enabled. Click Next.
On the Review Details page, click Next.
Select the appropriate datastore for the ZVM Appliance. The ZVM Appliance requires 180 GB of disk space if thick provisioned. Click Next.
Select the proper port group. The ZVM Appliance requires communications to vCenter server, ESXi hosts, as well as the remote DR site. Click Next.
In the Customize template page, you can configure parameters for a static IP network. DHCP is used by default if you make no changes.
Note: We highly recommend utilizing a static IP.Review the defined parameters, and click Finish to start the deployment.
Once the OVF deployment process is completed, power on the ZVM Appliance VM.
Once the ZVM Applianceis fully booted, VMware Tools will report the IP configuration in the vSphere web interface.
In a browser, navigate to https://<ZVM IP Address>.
Source: https://help.zerto.com/bundle/Linux.ZVM.HTML.10.0_U4/page/ZVM_Linux_Deployment_Guide.htm
Configuring the ZVMA
ZVMA Password Manager
When you go to the ZVM Appliance site you are directed to the Management Console, Reset Password tab.
Set the relevant credentials for Zerto, Keycloak and the VM console.
Click Set Passwords to complete configuration.
Source: https://help.zerto.com/bundle/Linux.ZVM.HTML.10.0_U4/page/ZVM_Appliance_Reset_Password.htm
Post Deployment Configuration
In the Deployment Settings screen, VC Configuration, configure your vCenter server information, including IP or hostname, username, and password. Note that the hostname is case sensitive.
Click Configure.
Source: https://help.zerto.com/bundle/Linux.ZVM.HTML.10.0_U4/page/ZVM_Linux_Deployment_Settings.htm
Site Pairing
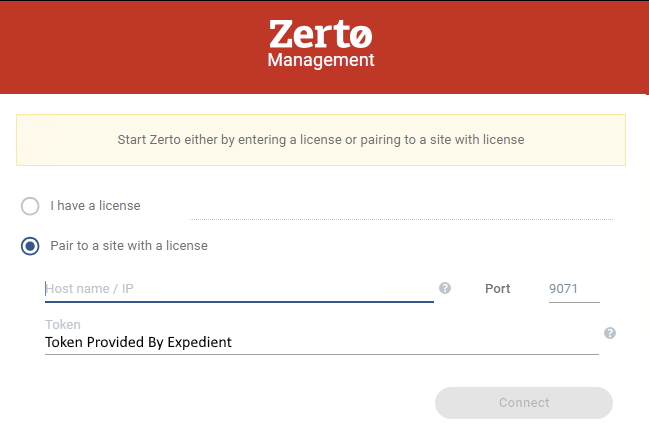
Login to the ZVMA GUI
Enter the ZCC IP and Pairing Token provided to you by Expedient and Click Connect.
Install Virtual Replication Appliances
The Virtual Replication Appliance (VRA) is a vendor custom build Debian-based Linux virtual machine that communicates with the virtual hypervisor. It reads input/output changes and writes them to a journal. The VRA is in a 1:1 ratio with the ESXi hosts in your environment. For example, if you have four ESXi hosts, you must install four VRA appliances (one on each host).
To configure and install Zerto Virtual Replication Appliances (VRAs) on a host, in the Zerto User Interface, click SETUP > VRAs.
Select a host which requires a VRA and click NEW VRA.
The Configure and Install VRA dialog is displayed.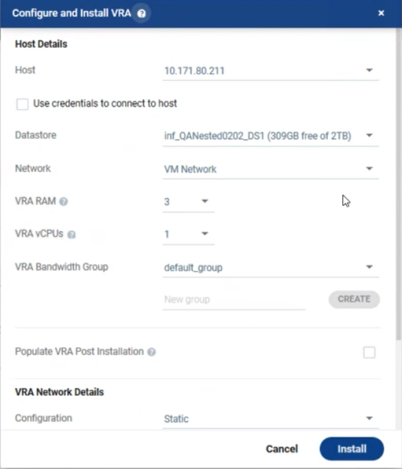
There will be a prompt to enter the settings of the ZRA:
Host: Select an ESXi host for the VRA installation (each host will need a VRA deployed).
Select the option, "Use credentials to connect to host."
Host Root Password: Enter the root password for the hosts.
Datastore: Pick a datastore in your environment with available space.
Network: Pick the applicable Zerto ZVM Replication network.
VRA RAM: 3 GB
VRA vCPUs: 1
Configuration: Static
Address: Pick an available IP address on your network.
Subnet Mask: Enter the relevant subnet mask. (i.e. 255.255.255.0)
Default Gateway: Enter the appropriate gateway for the network.
Click Install.
The VRA installation starts and the status is displayed in the TASKS popup dialog in the status bar and under Monitoring > Tasks.
The VRA displayed name, and DNS name, is Z-VRA-hostname. If a virtual machine with this name exists, for example when a previous VRA was not deleted, the VRA name has a number appended to it.
Repeat this procedure to add a VRA to every host that hosts virtual machines for which you want replication.
• Zerto recommends installing a VRA on every listed host.
• An alert is issued after the first VRA is installed in a cluster because Zerto recommends installing a VRA on every host in the cluster. The alert is automatically removed when all the hosts in the cluster have VRAs installed.
• For details of the maximum number of volumes that a VRA can manage, whether these are volumes being protected or recovered, refer to Zerto Scale and Benchmarking Guidelines.
• VRAs are configured and managed by the Zerto Virtual Manager. You cannot take snapshots of VRAs as snapshots cause operational problems for the VRAs.
Source: https://help.zerto.com/bundle/Linux.ZVM.HTML.10.0_U4/page/ZVM_Linux_Deployment_Settings.htm
Firewall Considerations
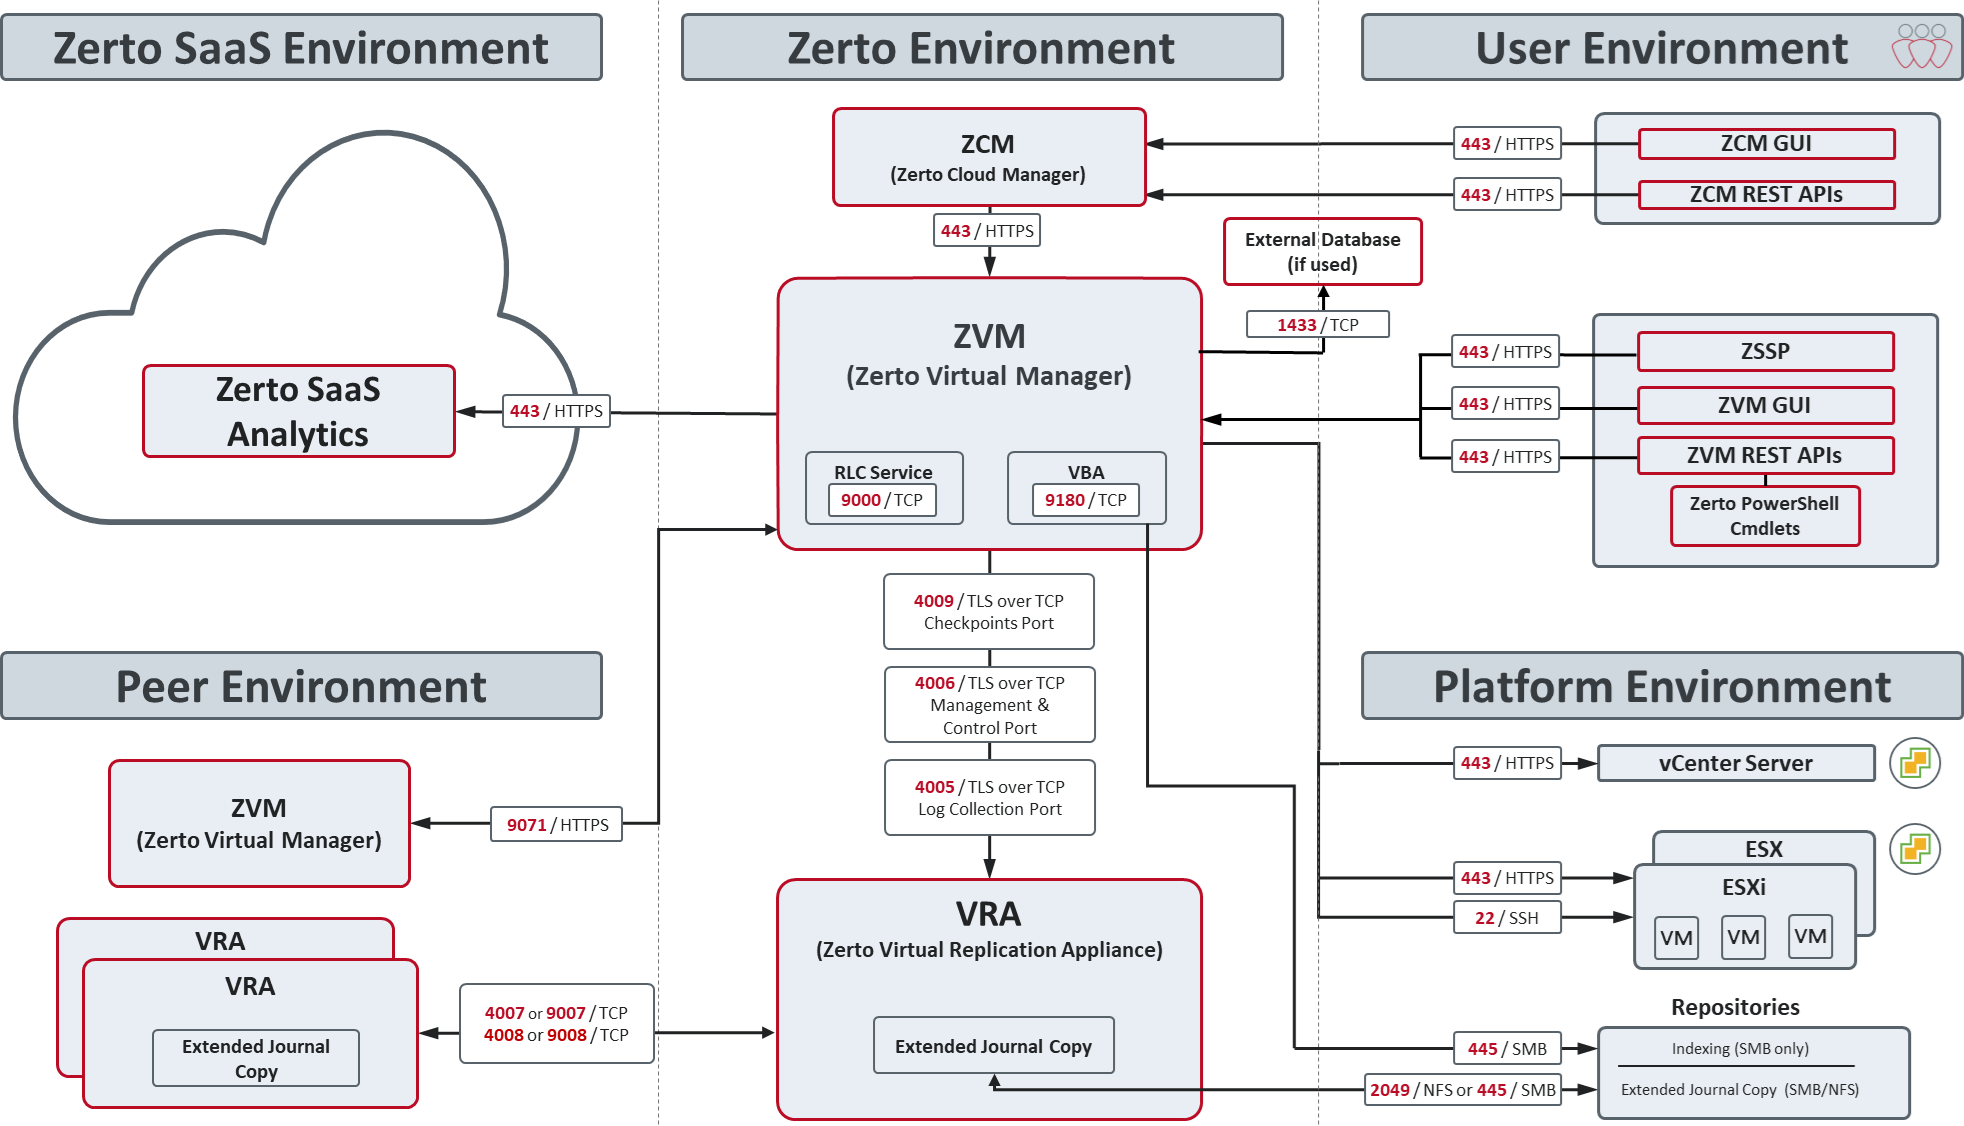
Port | Purpose |
|---|---|
22 | Required between the ZVM Appliance and an ESXi host during installation of a VRA |
80 | VSS communication |
443 | Communication between ZVM Appliance and ZVM GUI and ZVM REST APIs, Zerto Powershell Cmdlets, and the ZCM |
1433 | Required to connect to the external SQL database if an external database is used. |
2049 | Required between Extended Journal Copy and a network shared repository on top of NFS protocol |
4005 | Log collection between the ZVM Appliance and site VRAs, using TLS over TCP communication |
4006 | TLS over TCP communication between the ZVM Appliance and local site VRAs and the site VBA |
4007 | Unencrypted TCP communication between protecting and peer VRAs |
4008 | Unencrypted TCP communication between VRAs to pass data from protected virtual machines to a VRA on a recovery site |
4009 | TLS over TCP communication between the ZVM Appliance and local site VRAs to handle checkpoints |
9007 | Encrypted TCP communication between protecting and peer VRAs |
9008 | Encrypted TCP communication between VRAs to pass data from protected virtual machines to a VRA on a recovery site |
9071 | HTTPS communication between paired ZVMAs |
9180 | Communication between the ZVM Appliance and the VBA |
11371 | Required for installing Ansible |
Source: https://help.zerto.com/bundle/Linux.ZVM.HTML.10.0/page/DNS_Targets_Ports.htm
Future Upgrades
Please note that both the source and destination ESXi host servers must support the replicated virtual machine's hardware version. When either performing upgrades to the ESXi hosts or upgrading virtual machine hardware versions, please first verify the compatibility of the virtual machine's hardware version.
For example:
vSphere 6.7u2+ supports hardware 7, 8, 9, 10, 11, 13, 14, and 15
vSphere 7.0 u3 supports hardware 7, 8, 9, 10, 11, 13, 14, 15, 17, and 19