Active Directory Connector manages IDM user authentication against Active Directory and provide real-time synchronization.
Prerequisites
System Requirements
- Windows Server* 2012, 2016, or 2019
- Pentium 4 or better, 512MB of RAM, and 120 MB of Disk
*Installation not compatible with FIPS compliance mode
Configuration
- .NET Framework 4.5.1 and up
- Enable directory fallback password cache and enable password mapping (enabled by default)
DMZ Installation
- Windows Server must be connected to the Domain Controller for ADC installations.
- Active Directory Connector uses only the following network ports for connections to AD:
- TCP 389 – For the ADC to connect to AD using LDAP
- TCP 636 – For the ADC to connect to AD using LDAPS
- TCP/UDP port 53 for DNS connections
Install Active Directory Connector 5
Run the Active Directory Connector Wizard
1. As an admin, go to Users > Directories, and click New.
2. On the Select a Directory Type page, choose Active Directory from the list of available directory types.
3. In Section A, name your directory.
4. In Section B, click Download AD Connector Version to download the installer file.
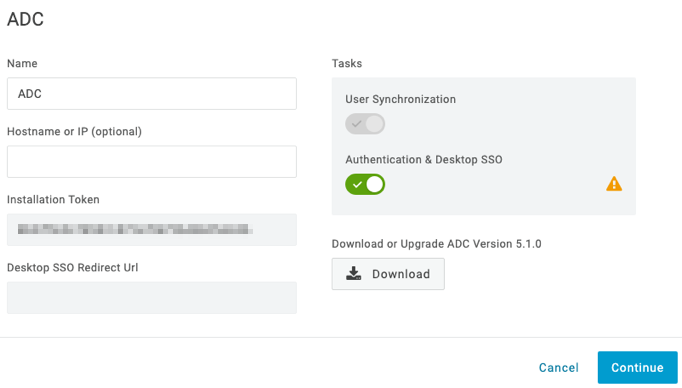
5. Copy the installation token and enter it, when prompted, during the Active Directory Connector install.
Installation
Install the connector on a server on the same network as your Active Directory service.
Download the Active Directory Connector Installer
1. Sign in as a domain administrator on the machine that will host your Active Directory Connector.
2. Run the Active Directory Connector installer that you previously downloaded.
3. Click Next, on the Welcome page and accept the license terms on the End-User License Agreement Page.
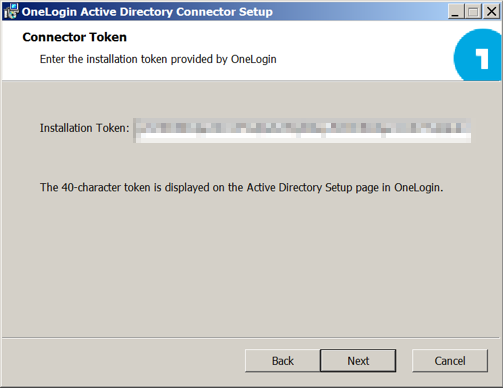
4. On the Connector Token dialog, paste the token you copied from the Active Directory Setup wizard.
5. On the Service Log On Credentials page, provide the domain and account used to run the Active Directory Connector.
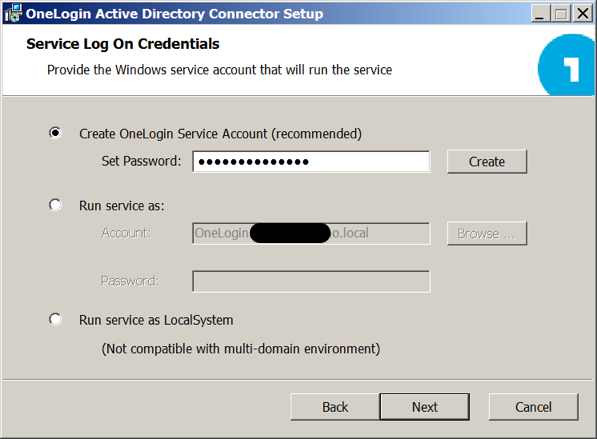
6. Select the appropriate options, depending on your current system setup:
- Upgrading an existing Active Directory Connector - select "Use existing OneLogin Service Account"
- No ADC has been installed on this machine - select "Create a OneLogin Service Account"
- If you want to use an existing domain service account, select "Run service as" and enter the domain and account used to run the Active Directory Connector.
- Must be a domain service account
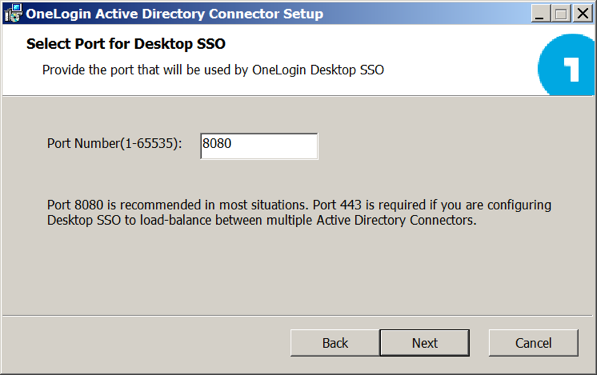
7. On the Select Port for Desktop SSO dialog, provide the port used for Desktop SSO (typically 8080 or 443 for multiple load-balanced ADCs)
8. Select your country (US or EU) then click Install.
When the installation is complete, you have the option to launch the Domain Configuration wizard, which enables you to select the domains that the Active Directory Connector syncs with IDM.
You can run the Domain Configuration Wizard at any time by launching ADConfigWizard from the Active Directory Connector installation directory.
9. After the install, you will be prompted to import ysers.
- Select the OUs and/or Domains you wish to synchronize with. Click Finish.
- To initialize the first synchronization click on the More Actions menu and select Synchronize Users.
Next: Configure the Active Directory Connector
Further Reference
KB Article: Automated AD Connector Notifications
External Site: OneLogin Knowledge Base