1. On the top bar, select Notifications
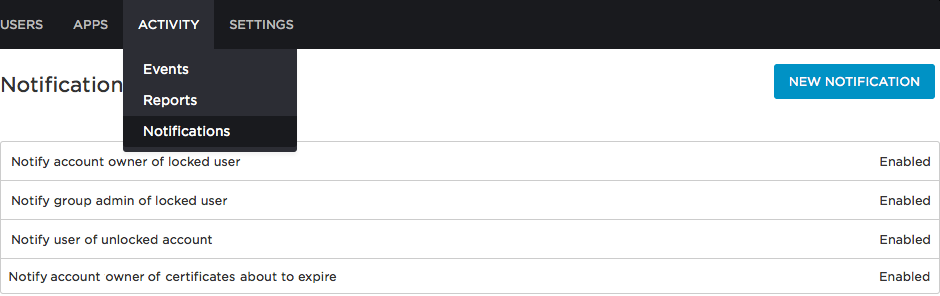
2. Click New Notification
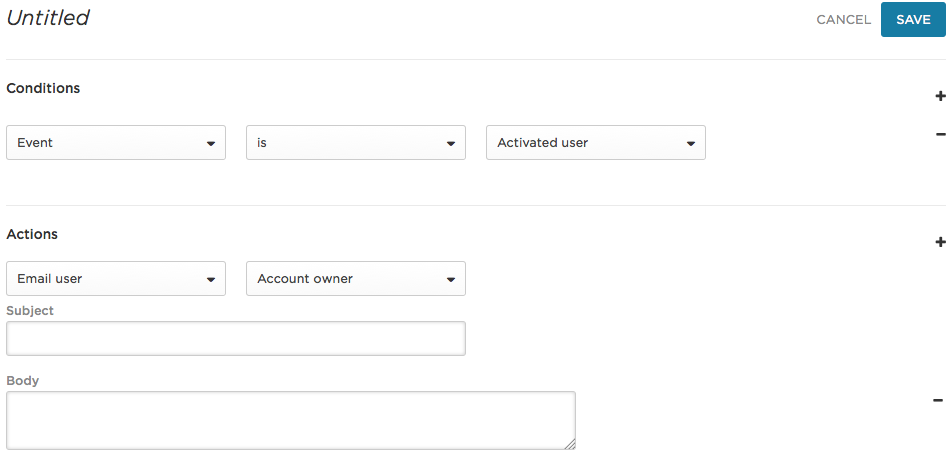
3. Name the notification, then define conditions that will trigger a notification
- Options are Events, Status Updates, Group Membership, and Role Membership
- Click the plus + button to add more conditions for your new notification
4. Set the notification Action for the conditions, which will enable you to select an email recipient
5. Select Custom from the recipient drop-down to display a free-form More Recipients field, where you can enter any email addresses, regardless of whether they are defined as OneLogin users. You can also enter a placeholder for a custom user field (let's say a secondary email address field) in the format {{user.custom_attribute_shortname}} where shortname is the short name of the custom user field.
6. Provide the subject line and body text.
You can use any of the following placeholders to add variables with the {{double-bracket format}}:
Values
{{name}} - User's full name{{firstname}} - User's first name{{firstinitial}} - User's first initial of their first name{{lastname}} - User's last name{{lastinitial}} - User's first initial of their last name{{email}} - User's email address{{email_name_part}} - User's email address before the @{{email_domain_part}} - User's email address after the @{{username}} - User's username{{department}} - User's department{{title}} - User's title{{openid_name}} - User's OpenID name{{samaccountname}} - User's sAMAccount name (from Active Directory){{member_of}} - User's member of (from Active Directory){{external_id}} - User's external id (from Active Directory){{userprincipalname}} - User's Userprincipalname (from Active Directory){{strongpwd}} - A randomly generated strong password{{directory_name}} - User's directory name{{account_name}} - OneLogin Account name{{account_url}} - Subdomain Login (e.g. mycompany.onelogin.com){{password_url}} - Password Set URL, which allows a user to create a password{{onelogin_id}} - OneLogin ID (a unique integer assigned to each user by OneLogin). This is primarily intended for mapping to a custom field and provisioning a unix ID to Active Directory.{{generate_uuid}} - Generates a UUID for a user.User custom fields can also be used in a macro. The syntax is {{custom_attribute_<name>}} where <name> is the shortname of the custom field (i.e {{custom_attribute_foo}}).If you want to add additional actions for the triggering condition, click the plus + button. You can configure multiple actions per notification event.
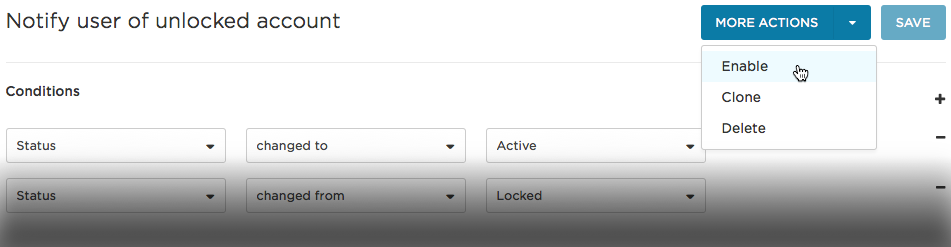
Enable or Disable Notifications
Enable
- The default notification types are enabled by default. To enable custom notifications, go to the Notifications page, open the custom notification, and go to More Actions > Enable
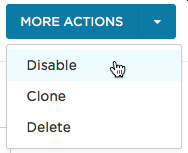
Disable
- To disable a notification, open it and go to More Actions > Disable
Further Reference
KB Article: Automated AD Connector Notifications
External Site: OneLogin Knowledge Base