Within the Expedient Cloud, you can leverage existing catalogs or create your own catalog to upload and save OVA OVF to deploy vApps. OVF/OVA packages are for appliance and server deployments created by a vendor, software community, or custom-built by an IT team, and can also be used to move VMs from one platform or location to another by converting/downloading a VM as an OVF/OVA template.
Before you begin, please review these notes from the corresponding Broadcom article:
If the OVF/OVA you are trying to deploy is a vendor supplied virtual appliance and fails to deploy due to the listed validation restrictions, please make the OVA/OVF package available to Expedient staff via a web or SFTP/FTPS server/ dropbox / sharepoint, etc., and open a support ticket in the SMC so we can attempt deploying the OVF on your behalf directly via the vCenter which lives behind the EEC portal.
* Verify that you have an OVF package to upload and that you have permission to upload OVF packages and deploy vApps.
* Verify that the OVF version in the OVF descriptor file is not 0.9.
* The default maximum supported size of an OVF descriptor file in VMware Cloud Director is 12 MB.
* Verify that the default maximum allowed size of the manifest file (.mf extension) is 1 MB.
* Verify that the OVF package complies with the OVF XSD schema.
* If a hardware version is provided in the VirtualSystemType element of the OVF descriptor file, verify that it is lower than the highest hardware version that is supported in the VDC where you upload the OVF.
    - In EEC1, the highest supported virtual hardware version is 19.
    - In EEC2, the highest currently supported virtual hardware version is 21 (as of 03/04/2026).
* If the OVF descriptor file contains ExtraConfig elements, verify that your system administrator included these elements in AllowedList of extraConfigs elements. Elements that are not included in the AllowedList cause the OVF upload to fail with a validation error.
VMware Cloud Director (which the EEC portal is built on) has its own restrictions for OVF deployments that differ from the restrictions in vCenter. As a result, an OVF deployment that is successful in vCenter might fail in VMware Cloud Director.
VMware Cloud Director supports OVF 1.1, but it does not support all the sections of the OVF 1.1 schema. For example, the DeploymentOptions section in OVF is not supported.
An OVF deployment in VMware Cloud Director involves many components, such as TransferService, spool area on NFS mount, NFC connection to vCenter, checksum validation, and so on. If any of these components fail, this results in OVF upload failure.
If you upload an OVF package with a manifest file, VMware Cloud Director validates the SHA-1 hash of the OVF descriptor file and all VMDK files to the values in the manifest.mf file. If any hash does not match, the upload fails.
To Deploy an OVA/OVF as a new Virtual Machine using a one-time deployment (no template)
- In the vApp section of your Virtual Datacenter, select New > Add vApp from OVF

- Select Browse, then select the OVA or OVF file from your computer. For OVFs, multi-select all files that came with it, such as the .ovf, .mf, and .vmdk files

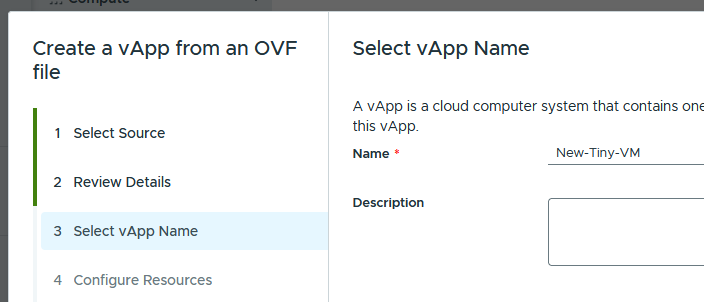
- Choose a name
- Customize the resources, such as choosing a storage policy if you have multiple

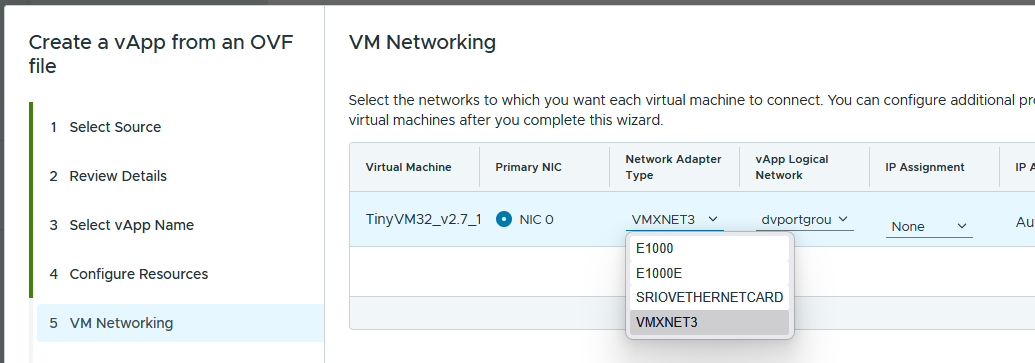
- Customize the Networking, such as changing the adapter type and choosing a network to attach it to (this will be a network defined inside the OVF, we will map it to a network in your tenant in a later step)
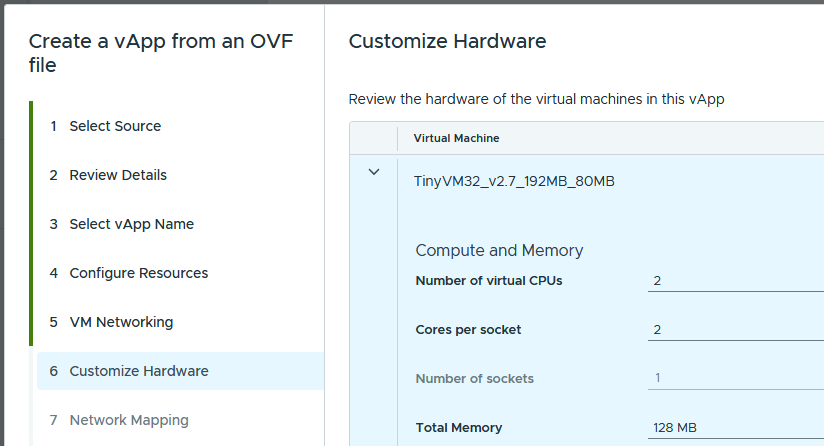
- Customize the hardware, such as changing the number of vCPUs, cores per socket, and memory settings
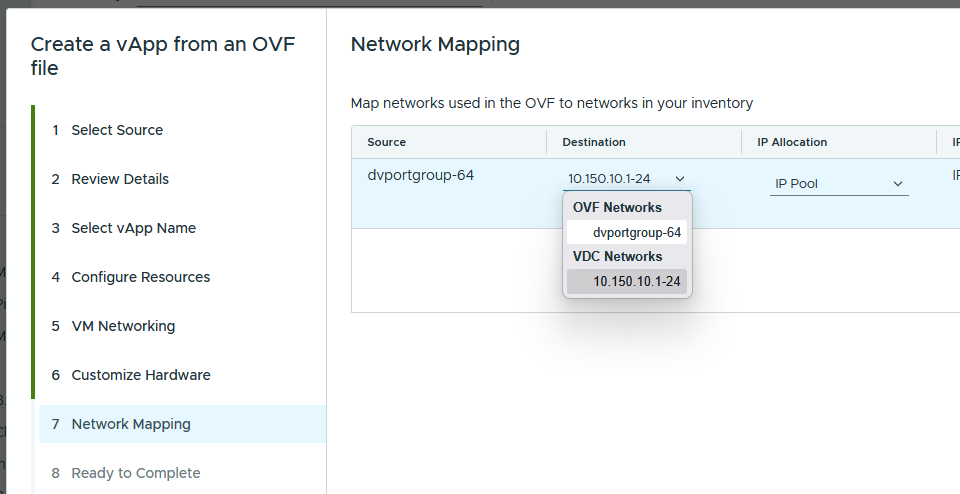
- Map the network from the OVF to a network in your tenant
- Review the details and click Finish
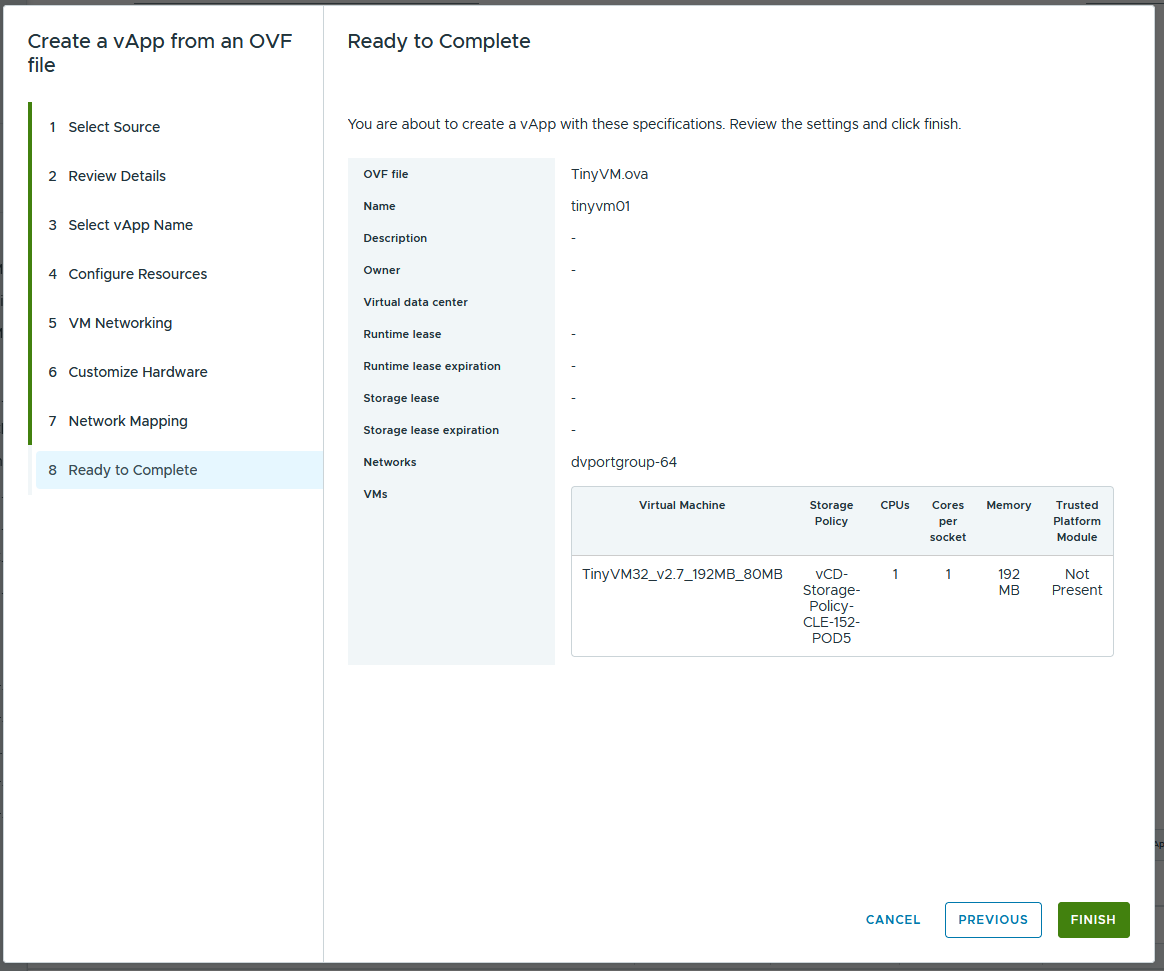
- Review the Tasks to monitor the creation. It’s expected that the process will hang at 1% for the duration of the upload of the OVA/OVF from your computer to the EEC portal, please don’t close this tab in your browser.


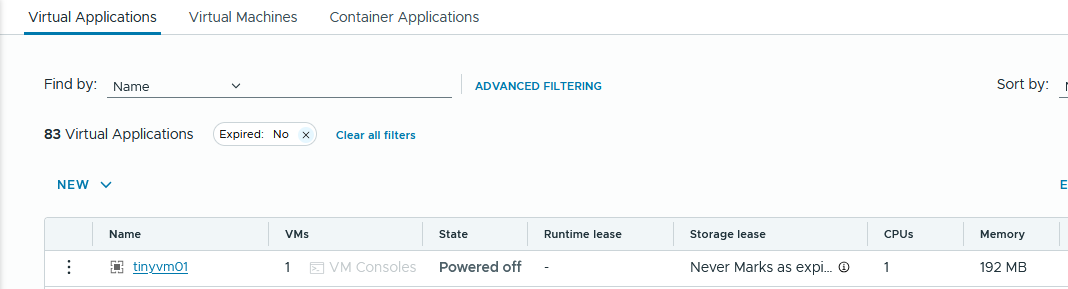
- Your VM is now ready as a new vApp. Multiple VMs can be placed inside a single vApp and managed as a unit.
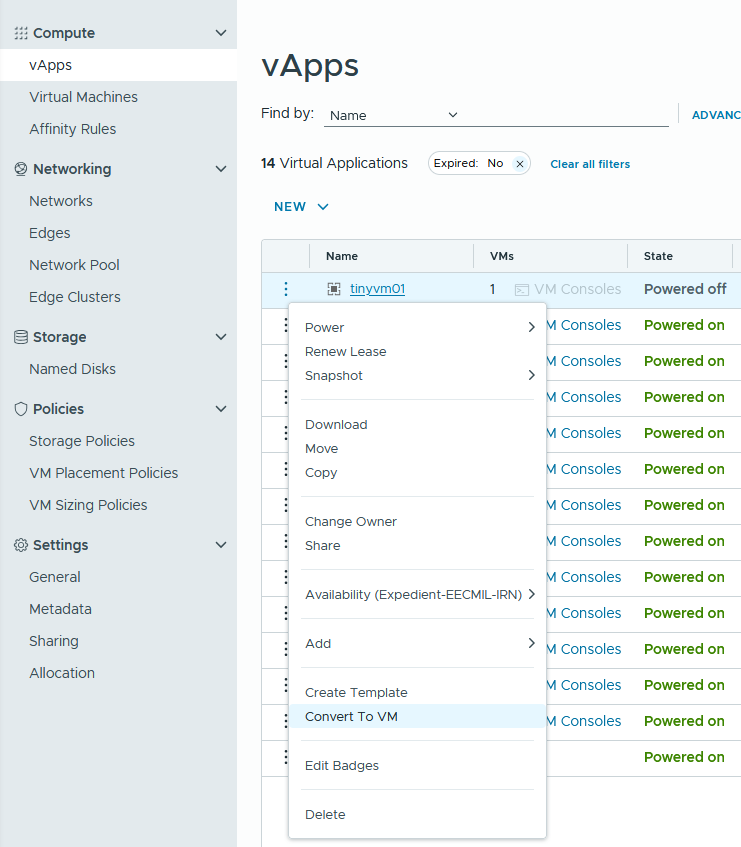
- If you don’t want your new VM to be part of a vApp, you can convert it to a standalone VM like so:
Broadcom Knowledge Base:
Create a vApp From an OVF Package in the VMware Cloud Director Tenant Portal
Working with vApps in the VMware Cloud Director Tenant Portal
To use an OVA/OVF to create a VM Template that can then be used to easily create multiple VMs:
- If you have not already, follow the instructions found here: How to Create a Content Library Catalog
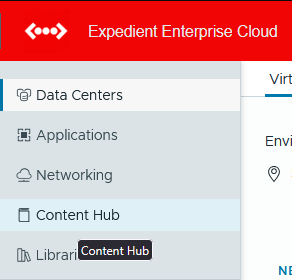
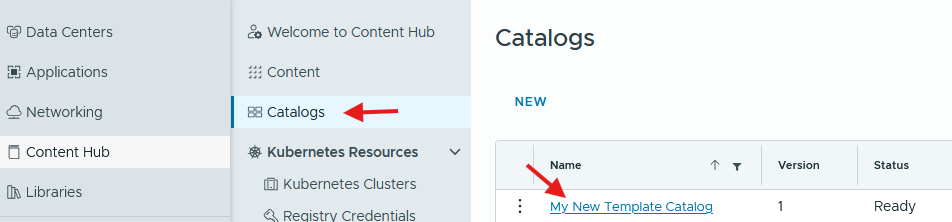
- From the main portal page, on the left side of the screen, select Content Hub:
- Select Catalogs, then select the Catalog you want to upload the OVF/OVA to
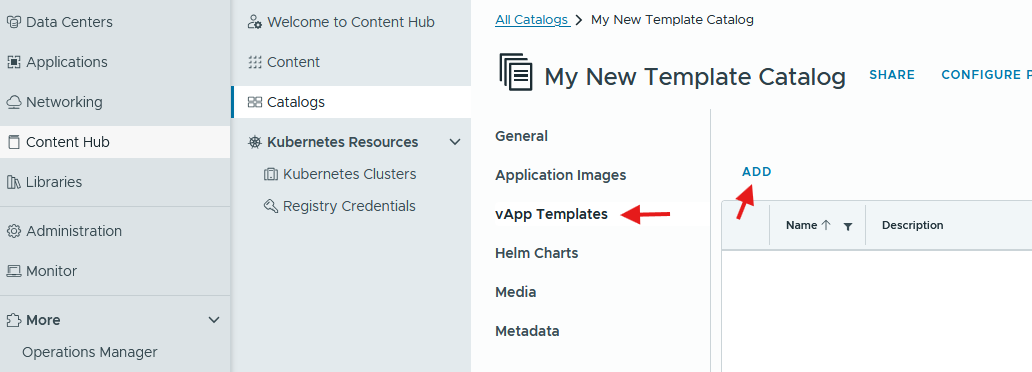
- Select vApp Templates and select Add
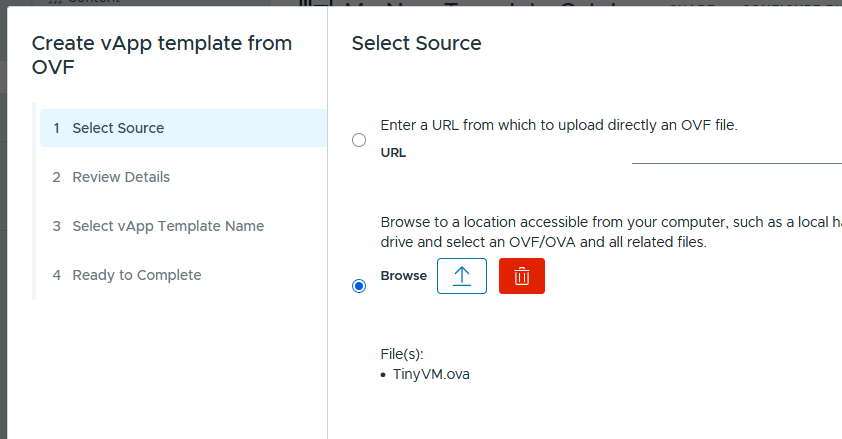
- Select browse and select your OVA/OVF file and continue to Select vApp Template Name
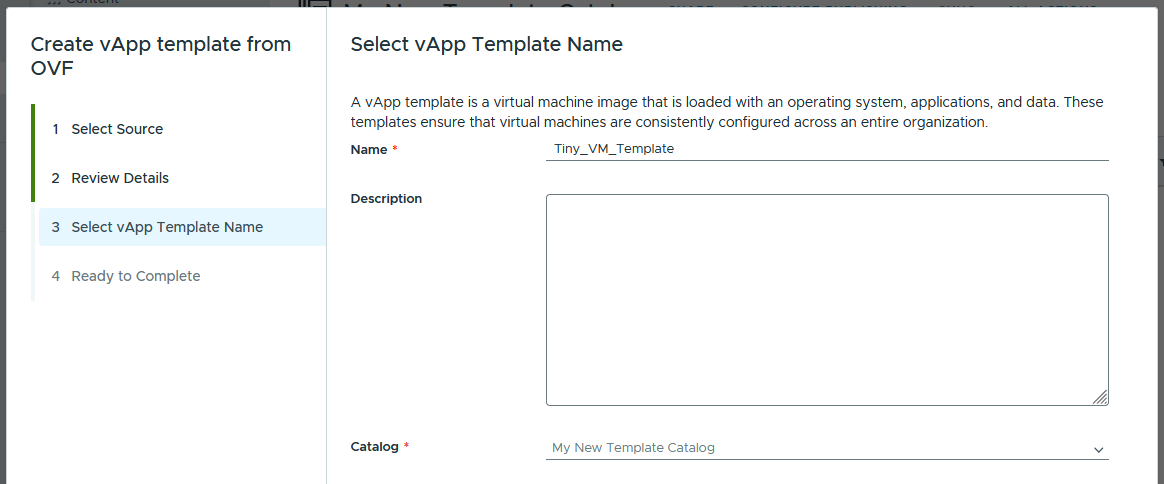
- Name your vApp Template and select your tenant catalog
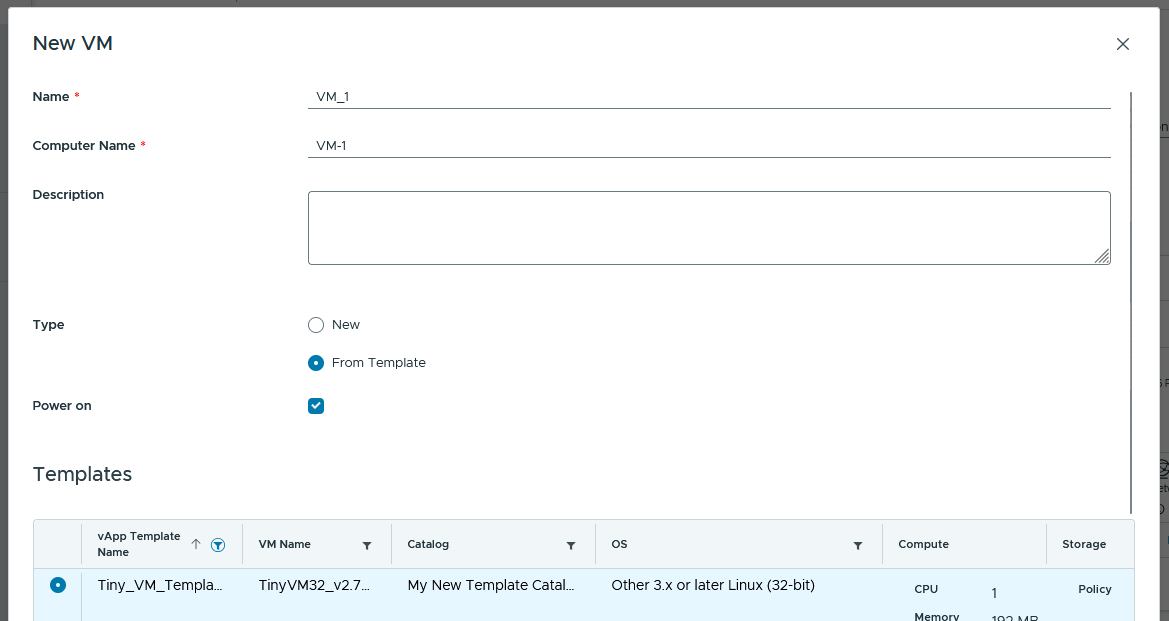
- You can now select this OVA/OVF under the New VM options. See How To Create A VM From A Template for more information
Broadcom Knowledge Base:
Create a vApp Template from an OVF File Using Your VMware Cloud Director Tenant Portal
Working with vApp Templates in the VMware Cloud Director Tenant Portal
Broadcom KB if OVA fails during upload “Validation failed for the OVF file you provided: Illegal size of field”: Uploading OVA or OVF fails in vCloud Director
Broadcom KB if OVA fails during upload without getting past 1% OVA Import/Export Fails in VMware Cloud Director
Note: In this case, check with your local networking to confirm your connection isn’t getting terminated by a firewall in your environment. Alternatively, open a ticket with the OSC and provide the OVF/OVA to us via a file-share or a USB drive brought to one of our data-centers and we can attempt the import on your behalf.